Basketweave Fox Amigurumi Pattern
Beginner Friendly
Perfect for those just starting their crochet journey, with clear instructions and simple techniques
Single-Day Project
A satisfying project you can complete in a single afternoon or evening.
Handmade Gift
A beautiful keepsake — free forever. Read online or print at home.
About This Basketweave Fox Amigurumi Pattern
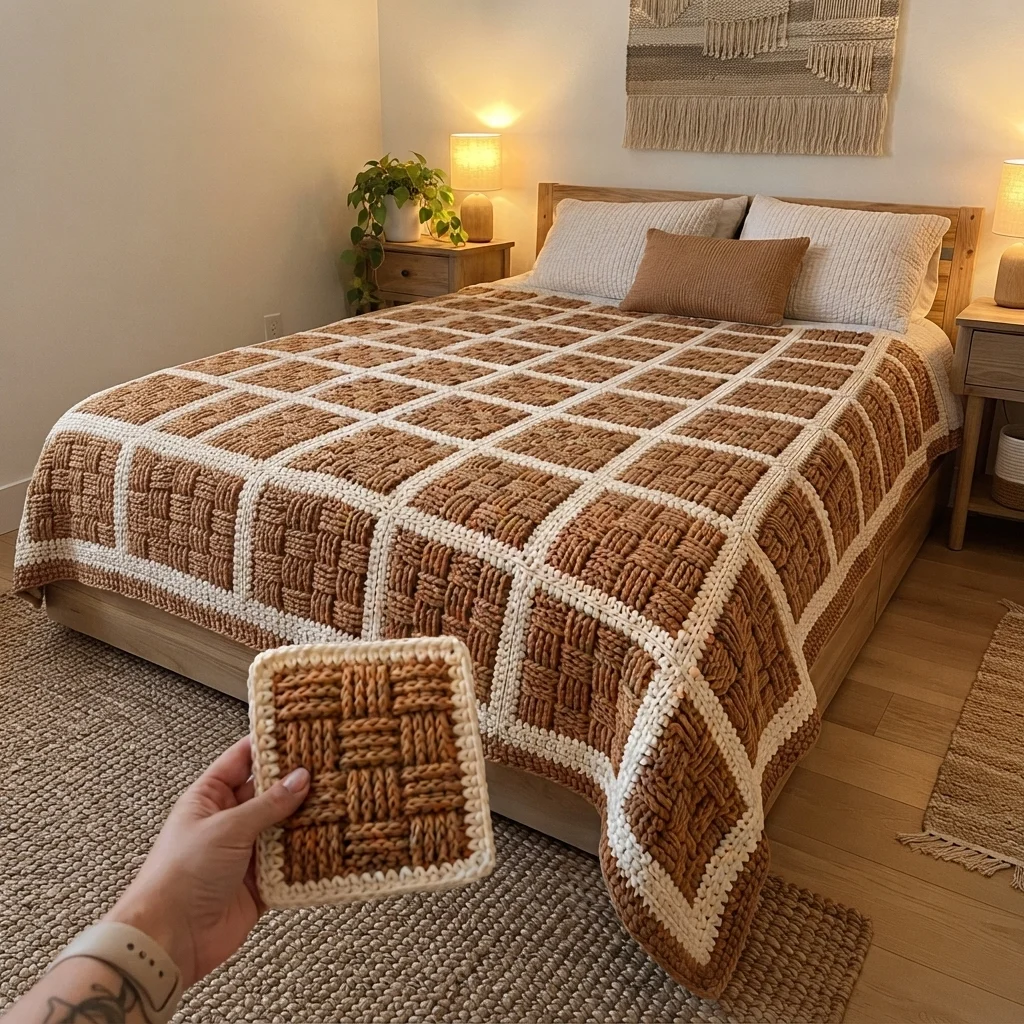
This basketweave fox amigurumi pattern takes the textured, woven look of a caramel-and-cream blanket and shrinks it into a soft toy. The fox is worked in warm caramel yarn with cream paws, muzzle, cheek tufts and tail tip, and a small basketweave patch with a cream border is sewn onto its belly like a patch on a favorite quilt.
It is an advanced pattern. You will crochet eleven separate pieces, change colors mid-round on the arms, legs and tail, work front post and back post double crochet in flat rows for the patch, and sew everything together by hand. Plan on seven to nine hours, spread over a few evenings.
It suits crocheters who are comfortable with magic rings, invisible decreases and post stitches. The finished fox sits about 22 cm tall and makes a cozy gift for anyone who loves warm neutral decor and handmade textures.
Materials
- DK cotton yarn, caramel (A) about 100 g
- DK cotton yarn, cream (C) about 50 g
- Crochet hook 3.0 mm
- Safety eyes 8 mm, 1 pair
- Dark brown embroidery thread for nose and mouth
- Polyester fiberfill
- Stitch markers
- Yarn needle
Abbreviations
MRmagic ringscsingle crochetinc2 sc in the same stitchdecsingle crochet 2 stitches together (invisible decrease)dcdouble crochetFPdcfront post double crochetBPdcback post double crochetchchainst(s)stitch(es)FOfasten offAcaramel yarnCcream yarn( )xrepeat the stitches in brackets the number of times givenHead (A)
- Round 1: 6 sc in MR (6)
- Round 2: inc x6 (12)
- Round 3: (1 sc, inc)x6 (18)
- Round 4: (2 sc, inc)x6 (24)
- Round 5: (3 sc, inc)x6 (30)
- Round 6: (4 sc, inc)x6 (36)
- Round 7: (5 sc, inc)x6 (42)
- Rounds 8-15: sc in each st around (42) for 8 rounds. Insert safety eyes between rounds 10 and 11, with 9 stitches between them.
- Round 16: (5 sc, dec)x6 (36)
- Round 17: (4 sc, dec)x6 (30)
- Round 18: (3 sc, dec)x6 (24). Stuff firmly.
- Round 19: (2 sc, dec)x6 (18)
- Round 20: (1 sc, dec)x6 (12)
- Round 21: dec x6 (6). FO, weave the tail through the front loops and pull closed.
Muzzle (C)
- Round 1: 6 sc in MR (6)
- Round 2: inc x6 (12)
- Round 3: (1 sc, inc)x6 (18)
- Rounds 4-5: sc in each st around (18)
- Round 6: (1 sc, dec)x6 (12). Stuff lightly. FO leaving a long tail.
- Embroider a small nose and a short mouth in dark thread, then sew the muzzle to the head over rounds 12-16, centered under the eyes.
Cheek Tufts (make 2, C)
- Round 1: 6 sc in MR (6)
- Round 2: inc x6 (12)
- Round 3: (1 sc, inc)x6 (18). FO leaving a long tail. Do not stuff; flatten and sew to each side of the muzzle.
Ears (make 2, A)
- Round 1: 6 sc in MR (6)
- Round 2: (1 sc, inc)x3 (9)
- Round 3: (2 sc, inc)x3 (12)
- Round 4: sc in each st around (12)
- Round 5: (2 sc, dec)x3 (9)
- Round 6: sc in each st around (9). FO leaving a long tail. Do not stuff; flatten the ear.
Inner Ears (make 2, C)
- Round 1: 6 sc in MR (6)
- Round 2: inc x6 (12). FO leaving a tail and sew each disc to the front of an ear.
Body (A)
- Round 1: 6 sc in MR (6)
- Round 2: inc x6 (12)
- Round 3: (1 sc, inc)x6 (18)
- Round 4: (2 sc, inc)x6 (24)
- Round 5: (3 sc, inc)x6 (30)
- Round 6: (4 sc, inc)x6 (36)
- Rounds 7-12: sc in each st around (36) for 6 rounds
- Round 13: (4 sc, dec)x6 (30)
- Rounds 14-15: sc in each st around (30)
- Round 16: (3 sc, dec)x6 (24)
- Round 17: sc in each st around (24). Stuff firmly. FO leaving a long tail.
Arms (make 2, start in C, finish in A)
- Round 1: 6 sc in MR (6)
- Round 2: inc x6 (12)
- Rounds 3-4: sc in each st around (12), in C. Change to A on the last stitch of round 4.
- Round 5: (4 sc, dec)x2 (10)
- Rounds 6-12: sc in each st around (10) for 7 rounds. Stuff lightly. FO leaving a long tail.
Legs (make 2, start in C, finish in A)
- Round 1: 6 sc in MR (6)
- Round 2: inc x6 (12)
- Round 3: (1 sc, inc)x6 (18)
- Rounds 4-5: sc in each st around (18), in C. Change to A on the last stitch of round 5.
- Rounds 6-7: sc in each st around (18)
- Round 8: (1 sc, dec)x6 (12). Stuff the foot firmly.
- Rounds 9-13: sc in each st around (12) for 5 rounds. Stuff firmly. FO leaving a long tail.
Tail (start in C, finish in A)
- Round 1: 6 sc in MR (6)
- Round 2: inc x6 (12)
- Round 3: (1 sc, inc)x6 (18), in C. Change to A on the last stitch.
- Round 4: (2 sc, inc)x6 (24)
- Rounds 5-11: sc in each st around (24) for 7 rounds. Stuff as you go.
- Round 12: (2 sc, dec)x6 (18)
- Round 13: (1 sc, dec)x6 (12). Add the last of the stuffing. FO leaving a long tail.
Basketweave Belly Patch (flat, worked in A)
- Foundation: with A, ch 9. Work 1 sc in the 2nd ch from the hook and in each ch across (8). Do not turn yet.
- For every row below, ch 2 (does not count as a stitch) and turn. Work 8 dc-height post stitches across, one in each stitch. Always work the stitches in the order given, starting from the side that is facing you on that row. Row 1 is worked around the posts of the sc foundation row.
- Row 1 (RS): 4 FPdc, 4 BPdc (8)
- Row 2 (WS): 4 FPdc, 4 BPdc (8)
- Row 3 (RS): 4 FPdc, 4 BPdc (8)
- Row 4 (WS): 4 FPdc, 4 BPdc (8)
- Row 5 (RS): 4 BPdc, 4 FPdc (8). The blocks now swap, which creates the woven look.
- Row 6 (WS): 4 BPdc, 4 FPdc (8)
- Row 7 (RS): 4 BPdc, 4 FPdc (8)
- Row 8 (WS): 4 BPdc, 4 FPdc (8). FO A.
- Border: join C in any corner. Round 1: sc evenly around the square, working 3 sc in each corner stitch. Round 2: sc in each st around, working 3 sc in each corner stitch. Join with a sl st, FO leaving a long tail.
Finishing
Sew the head to the top of the body through the 24 neck stitches, adding a little more stuffing if the neck wobbles. Sew the ears to the head about 12 stitches apart across the top, angled slightly outward so they stand up like fox ears. Sew the arms to the sides of the body around rounds 14-15, with the cream paws pointing down. Sew the legs to the lower front of the body around rounds 4-6, with the feet pointing forward so the fox sits upright. Sew the tail to the back at the base, flattening the open end first.
Pin the basketweave patch centered on the belly, then whip stitch it down through the cream border using small, even stitches. Weave in all ends.
Tips for Success
- Mark the last stitch of every round on the head and body so the color changes on the arms, legs and tail land in the same spot.
- Work the last stitch of the old color with the new yarn so the change looks clean.
- Block the belly patch flat with a damp cloth before sewing it on, since post stitches curl at the edges.
- Place the safety eyes before stuffing the head, and test the position with pins before you lock them.
- Stuff the legs and the bottom of the body firmly so the fox sits without help.
Common Mistakes to Avoid
- Working a post stitch around the wrong side of the stitch below flattens the weave. Check the direction of every block before you start the row.
- Swapping the blocks at row 4 or row 5 by mistake breaks the checkerboard. Mark each row off as you finish it.
- Sewing the ears too low makes the head look flat. Pin them first and step back before stitching.
- Leaving gaps at the neck seam lets the head droop. Sew all 24 stitches with small, tight stitches.
- Loose decreases on the legs show stuffing. Use invisible decreases and go down a hook size if gaps appear.
Ways to Customize This Pattern
- Swap caramel for gray, charcoal or sage to make an arctic fox or a forest fox.
- Work the patch in a rust color with an oatmeal border for a deeper autumn palette.
- Sew two small patches on the back or an arm for a full patchwork look.
- Add a scarf from a long cream chain and a few rows of sc, tied around the neck.
- Use a thicker yarn and a 4.5 mm hook for a larger snuggle-sized fox, adding a few rounds to each piece.
Frequently asked questions
Yes. Cotton gives sharper stitch definition on the basketweave, but a DK acrylic works if you keep your tension firm. Make sure both colors are the same weight so the patch lies flat.
For a front post stitch, insert the hook from front to back around the post of the stitch below, from the right side of the work. For a back post stitch, insert it from back to front around the same post. Yarn over and finish as a double crochet.
Yes. The fox is complete without it, and the cream paws, muzzle and tail tip still carry the color story. You can also crochet a plain caramel square with a cream border for a simpler look.
For a child under three, skip the safety eyes and embroider the eyes with dark thread instead, and sew the muzzle, ears and patch on securely.
The finished Basketweave Fox Amigurumi Pattern

