Bunny Granny Square Comfort Blanket Crochet Pattern
Advanced
For experienced crocheters who enjoy complex shaping, fine detail, and ambitious construction
Single-Day Project
A satisfying project you can complete in a single afternoon or evening.
Handmade Gift
A beautiful keepsake — free forever. Read online or print at home.
About This Bunny Granny Square Comfort Blanket Crochet Pattern
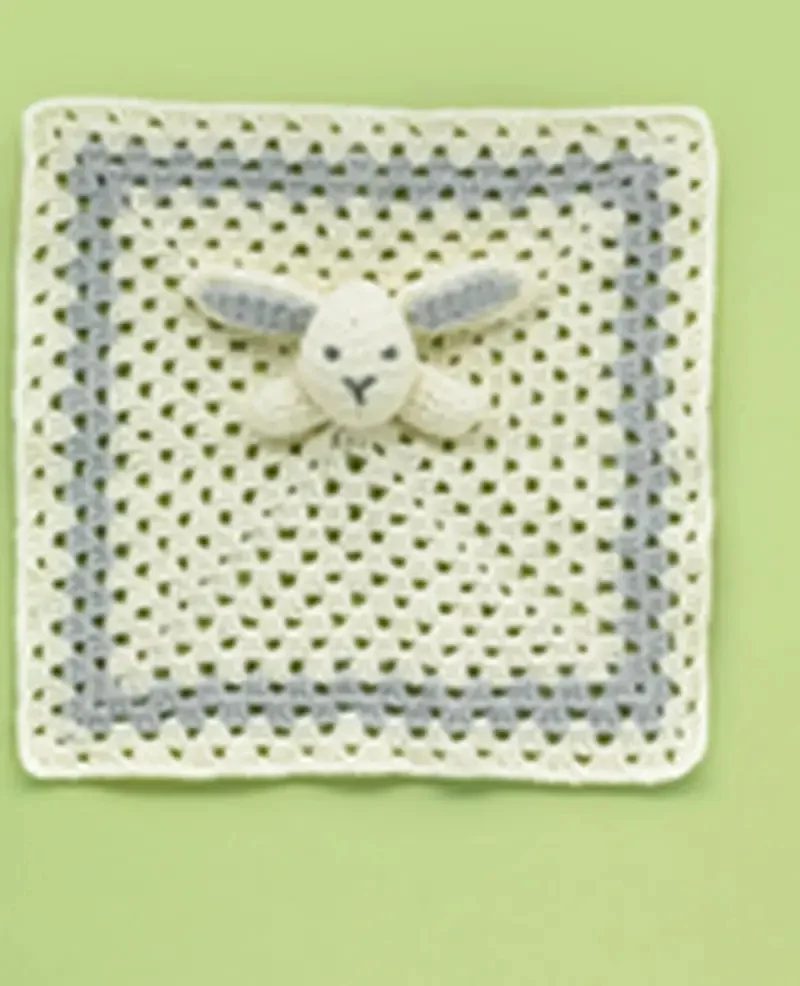
This bunny comfort blanket crochet pattern pairs an airy ivory granny square with a soft gray frame and a raised bunny appliqué. Long ivory ears with gray centers spread outward above the embroidered face, while two small paws sit beside the lower cheeks. The square stays flat beneath the bunny, matching the simple, open construction in the reference.
Allow approximately 10–14 hours for the blanket, separate appliqué pieces, and careful assembly. This advanced project suits crocheters comfortable with granny-square construction, tight spiral crochet, tapered shaping, embroidery, and sewing dimensional pieces onto open fabric. The most demanding step is securing the bunny without pulling the granny clusters out of shape.
Materials
- Ivory DK yarn Approximately 240 g / 600 m; smooth, washable cotton or cotton blend
- Soft gray DK yarn Approximately 50 g / 125 m, matching the ivory yarn in thickness
- Dark charcoal embroidery thread For eyes, nose, and mouth
- Crochet hooks 4 mm for the blanket; 3 mm for the bunny pieces, or sizes needed for gauge
- Washable polyester stuffing Approximately 10–15 g for the head and paws
- Yarn needle, embroidery needle, scissors, stitch markers, and blocking pins Use removable markers to plan the appliqué placement
Abbreviations
chchainsl stslip stitchscsingle crochet, US terminologydcdouble crochet, US terminologyinc2 sc in the same stitchdecInvisible single crochet decrease over 2 stitchessc2togSingle crochet 2 stitches together through both loopsMRmagic ringst / stsstitch / stitchesGauge, Size, and Construction
- Use US crochet terminology throughout. Blanket gauge with the 4 mm hook: the first 4 granny rounds measure approximately 10.5 cm across after washing and light blocking. Make these rounds as your swatch; continue them as the blanket if gauge is suitable.
- Appliqué gauge with the 3 mm hook: 24 sc and 26 rounds measure approximately 10 × 10 cm. Fabric should conceal stuffing without feeling rigid. Adjust the appliqué hook separately from the blanket hook.
- The finished blanket measures approximately 44 × 44 cm, including its final sc edging. The head measures approximately 7 cm tall, each ear approximately 9 cm long, and each paw approximately 3.5 cm long. These are gauge-based estimates.
- The blanket uses joined granny rounds, turned after every round. The head, outer ears, and paws use continuous spirals without joining or turning; mark the first stitch and move the marker each round. Gray ear centers are worked in turned rows.
- All turning chains on the ear centers are excluded from stitch counts. On the blanket, beginning ch 3 counts as one dc. A cluster means 3 dc worked into one space; the beginning cluster is ch 3 plus 2 dc.
Ivory Granny Square and Gray Frame
- Round 1, ivory: In an MR, ch 3, 2 dc, ch 2; repeat (3 dc, ch 2) three times. Join with sl st to the top of beginning ch 3. Tighten the ring securely. Turn. Count: 4 clusters, 12 dc, and 4 corner ch-2 spaces.
- Round 2: Sl st into the adjacent corner space. Ch 3, 2 dc, ch 2, 3 dc in that space. Ch 1; work (3 dc, ch 2, 3 dc) in the next corner, ch 1, three times. Join and turn. Count: 8 clusters, 24 dc, 4 side ch-1 spaces, and 4 corner ch-2 spaces.
- For Rounds 3–16, begin in the adjacent corner with sl st into that space. Work (ch 3, 2 dc, ch 2, 3 dc) there. Along each side, ch 1, then work 3 dc in each side ch-1 space with ch 1 between successive clusters; ch 1 before the next corner. Work (3 dc, ch 2, 3 dc) in each remaining corner. After the fourth side, join to beginning ch 3 and turn. Work into spaces only. Each round adds 4 clusters and 4 side spaces.
- Round 3, ivory: Use the established method, working 1 existing side space per side. Count: 12 clusters, 36 dc, 8 side ch-1 spaces, and 4 corner spaces.
- Round 4, ivory: Work 2 existing side spaces per side. Count: 16 clusters, 48 dc, 12 side ch-1 spaces, and 4 corner spaces.
- Round 5, ivory: Work 3 existing side spaces per side. Count: 20 clusters, 60 dc, 16 side ch-1 spaces, and 4 corner spaces.
- Round 6, ivory: Work 4 existing side spaces per side. Count: 24 clusters, 72 dc, 20 side ch-1 spaces, and 4 corner spaces.
- Round 7, ivory: Work 5 existing side spaces per side. Count: 28 clusters, 84 dc, 24 side ch-1 spaces, and 4 corner spaces.
- Round 8, ivory: Work 6 existing side spaces per side. Count: 32 clusters, 96 dc, 28 side ch-1 spaces, and 4 corner spaces.
- Round 9, ivory: Work 7 existing side spaces per side. Count: 36 clusters, 108 dc, 32 side ch-1 spaces, and 4 corner spaces.
- Round 10, ivory: Work 8 existing side spaces per side. Count: 40 clusters, 120 dc, 36 side ch-1 spaces, and 4 corner spaces.
- Round 11, ivory: Work 9 existing side spaces per side. Count: 44 clusters, 132 dc, 40 side ch-1 spaces, and 4 corner spaces.
- Round 12, ivory: Work 10 existing side spaces per side. Count: 48 clusters, 144 dc, 44 side ch-1 spaces, and 4 corner spaces.
- Round 13, ivory: Work 11 existing side spaces per side. Count: 52 clusters, 156 dc, 48 side ch-1 spaces, and 4 corner spaces. Fasten off after joining and turning.
- Round 14, gray: Join gray in a corner and use the established method, working 12 existing side spaces per side. Count: 56 clusters, 168 dc, 52 side ch-1 spaces, and 4 corner spaces.
- Round 15, gray: Work 13 existing side spaces per side. Count: 60 clusters, 180 dc, 56 side ch-1 spaces, and 4 corner spaces. Fasten off after joining and turning.
- Round 16, ivory: Join ivory in a corner and work 14 existing side spaces per side. Count: 64 clusters, 192 dc, 60 side ch-1 spaces, and 4 corner spaces. Join; do not turn.
- Round 17, ivory edging: Ch 1, sc in every dc, work 1 sc in every side ch-1 space, and work 3 sc in every corner ch-2 space. Join to the first sc and fasten off. Count: 264 sc, comprising 192 over dc, 60 in side spaces, and 12 in corners. Mark the middle sc of each corner group if needed for blocking.
Bunny Head
- Use ivory and the 3 mm hook. Round 1: 6 sc in MR. Count: 6 sts. This ring will become the crown of the head.
- Round 2: Inc in every st. Count: 12 sts.
- Round 3: (Sc, inc) six times. Count: 18 sts.
- Round 4: (2 sc, inc) six times. Count: 24 sts.
- Round 5: (3 sc, inc) six times. Count: 30 sts.
- Round 6: (4 sc, inc) six times. Count: 36 sts.
- Round 7: (5 sc, inc) six times. Count: 42 sts.
- Round 8: Sc in every st. Count: 42 sts.
- Round 9: Sc in every st. Count: 42 sts.
- Round 10: Sc in every st. Count: 42 sts.
- Round 11: Sc in every st. Count: 42 sts.
- Round 12: Sc in every st. Count: 42 sts.
- Round 13: (5 sc, dec) six times. Count: 36 sts.
- Round 14: (4 sc, dec) six times. Count: 30 sts. Mark two eye positions between Rounds 9 and 10 with 6 stitches between their centers across the selected front. Embroider each eye as a small charcoal oval about 3 mm wide, securing thread ends inside. Use embroidered eyes throughout this design.
- Round 15: (3 sc, dec) six times. Count: 24 sts. Add stuffing in small portions. Shape the head into a slightly flattened oval, keeping the back flatter than the face.
- Round 16: (2 sc, dec) six times. Count: 18 sts.
- Round 17: (Sc, dec) six times. Count: 12 sts. Add enough stuffing to support the cheeks without making a hard ball.
- Round 18: Dec six times. Count: 6 sts. Fasten off, thread the tail through the front loops of all 6 stitches, and draw closed. Bury this tail; use a separate long ivory strand for attachment.
Outer Ears — Make Two
- Use ivory and the 3 mm hook. Work from the rounded tip toward the narrow base. Round 1: 6 sc in MR. Count: 6 sts.
- Round 2: Inc in every st. Count: 12 sts.
- Round 3: (Sc, inc) six times. Count: 18 sts.
- Round 4: Sc in every st. Count: 18 sts.
- Round 5: Sc in every st. Count: 18 sts.
- Round 6: Sc in every st. Count: 18 sts.
- Round 7: Sc in every st. Count: 18 sts.
- Round 8: Sc in every st. Count: 18 sts.
- Round 9: Sc in every st. Count: 18 sts.
- Round 10: Sc in every st. Count: 18 sts.
- Round 11: Sc in every st. Count: 18 sts.
- Round 12: Sc in every st. Count: 18 sts.
- Round 13: (4 sc, dec) three times. Count: 15 sts.
- Round 14: Sc in every st. Count: 15 sts.
- Round 15: (3 sc, dec) three times. Count: 12 sts.
- Round 16: Sc in every st. Count: 12 sts.
- Round 17: (2 sc, dec) three times. Count: 9 sts.
- Round 18: Sc in every st. Count: 9 sts.
- Round 19: (Sc, dec) three times. Count: 6 sts.
- Round 20: Sc in every st. Count: 6 sts.
- Round 21: Sc in every st. Count: 6 sts.
- Round 22: Sc in every st. Count: 6 sts.
- Round 23: Sc in every st. Count: 6 sts. Leave unstuffed. Flatten with 3 stitches on each side of the opening and work 3 sc through both layers to close. Fasten off with a 30 cm sewing tail.
Gray Ear Centers — Make Two
- Use gray and the 3 mm hook. Work from the broad rounded tip toward the narrow base. Row 1: Ch 3, sc in second chain from hook and in the next chain. Count: 2 sts. Ch 1 and turn.
- Row 2: Inc in both sts. Count: 4 sts. Ch 1 and turn.
- Row 3: Inc, 2 sc, inc. Count: 6 sts. Ch 1 and turn.
- Row 4: Sc in every st. Count: 6 sts. Ch 1 and turn.
- Row 5: Sc in every st. Count: 6 sts. Ch 1 and turn.
- Row 6: Sc in every st. Count: 6 sts. Ch 1 and turn.
- Row 7: Sc in every st. Count: 6 sts. Ch 1 and turn.
- Row 8: Sc in every st. Count: 6 sts. Ch 1 and turn.
- Row 9: Sc in every st. Count: 6 sts. Ch 1 and turn.
- Row 10: Sc in every st. Count: 6 sts. Ch 1 and turn.
- Row 11: Sc2tog, 2 sc, sc2tog. Count: 4 sts. Ch 1 and turn.
- Row 12: Sc in every st. Count: 4 sts. Ch 1 and turn.
- Row 13: Sc in every st. Count: 4 sts. Ch 1 and turn.
- Row 14: Sc2tog twice. Count: 2 sts. Ch 1 and turn.
- Row 15: Sc in both sts. Count: 2 sts. Ch 1 and turn.
- Row 16: Sc in both sts. Count: 2 sts. Fasten off with a 45 cm tail. Do not add an edging.
- Center one gray panel on the front of each flattened ivory ear, with the broad end near the ear tip. Leave approximately 5 mm of ivory visible at the tip and along the sides. Sew around the gray panel using small stitches that catch only the front wall of the ear; keep the back free of visible gray stitches.
Little Paws — Make Two
- Use ivory and the 3 mm hook. Round 1: 6 sc in MR. Count: 6 sts.
- Round 2: Inc in every st. Count: 12 sts.
- Round 3: (Sc, inc) six times. Count: 18 sts.
- Round 4: Sc in every st. Count: 18 sts.
- Round 5: Sc in every st. Count: 18 sts.
- Round 6: Sc in every st. Count: 18 sts.
- Round 7: (Sc, dec) six times. Count: 12 sts. Add a small pinch of stuffing and flatten slightly.
- Round 8: Sc in every st. Count: 12 sts.
- Round 9: Dec six times. Count: 6 sts. Fasten off with a 40 cm tail. Draw the remaining front loops closed and retain the tail for sewing.
Facial Embroidery and Placement
- With charcoal thread, embroider a small V-shaped nose centered between the eyes, about one round below them. Make each arm of the V approximately 4 mm long. Add a vertical mouth stitch approximately 6 mm long from its bottom point toward the chin.
- Weave in blanket ends through the backs of several solid clusters, changing direction once before trimming. Wash and block the blanket to approximately 44 cm square, easing the corners into shape without stretching the spaces excessively. Let it dry completely.
- Lay the blanket with one edge horizontal at the top. Measure from the top-left corner. Position the head center approximately 22 cm from the left edge and 16.5 cm from the top edge, with the crown facing upward.
- Slide each ear base approximately 1 cm behind the upper side of the head. Angle the ears outward, placing their tips approximately 12 cm and 32 cm from the left edge, both about 11 cm from the top edge. Keep the gray panels facing up. Sew each ear base securely to the head before attaching the unit to the blanket.
- Position the paw centers approximately 17 cm and 27 cm from the left edge and 19 cm from the top edge. Angle their rounded ends outward, with the narrow ends tucked beneath the lower sides of the head. Check the whole arrangement before sewing.
Finishing
Sew the back of the head to the blanket along an oval attachment line approximately 4 cm wide and 5 cm tall. Use small stitches through the head fabric and the solid tops or posts of nearby granny clusters. Where the line crosses an open space, carry the sewing yarn within the back of the head to the next solid cluster. Keep the blanket flat beneath your hand and avoid drawing neighboring clusters together.
Sew each paw to solid blanket stitches around its underside, then secure its narrow end to the lower head. Tack the underside of each ear to two or three solid clusters along its length so the ears hold their outward position. Keep the tacks loose enough to preserve the blanket’s drape. Bury every sewing end securely inside a stuffed piece or through several solid clusters, and remove all markers.
Smooth the square once more and check that the gray frame remains level. The finished piece should have a soft raised bunny, flat ears, and a blanket that lies comfortably around the appliqué. For a baby gift, use embroidered features as written and keep the blanket out of an unattended infant’s sleep space.
Tips for Success
- Turn after every granny round through Round 15. Alternating the working direction helps reduce the spiral lean that can make the gray frame look crooked.
- Keep the gray ear panels slightly smaller than the ivory ears. Ease the panel flat while sewing instead of stretching it to cover the ivory margin.
- Use less stuffing at the back of the head than at the cheeks. A flatter back gives the head a broad sewing surface and helps the square stay level.
- Pin or mark the entire bunny arrangement before attaching any piece to the blanket. View it from directly above to check ear angles and paw spacing.
Common Mistakes to Avoid
- Missing the ch 1 immediately before a corner tightens that side. Count the side spaces after each round; Round 16 must have 15 on each side.
- Adding ch 1 inside the corner group changes the corner structure. Each corner is always 3 dc, ch 2, 3 dc.
- Pulling attachment stitches across open spaces gathers the blanket. Undo the tight stitches and route the yarn through the back of the head between solid anchor points.
- Overstuffing the paws makes them stand upright. Remove a little filling before closing so each paw rests as a shallow oval beside the face.
- Sewing through both walls of an ear leaves gray stitches on its back. Catch only the front wall when attaching the gray center.
Ways to Customize This Pattern
- Replace gray with oatmeal or pale blue in both frame rounds and both ear centers, keeping the ivory background for the same soft contrast.
- For a larger square, add two ivory granny rounds before the gray frame. Each extra granny round adds 4 clusters; retain the two gray rounds, one outer ivory granny round, and final sc edging.
- Make a lighter, flatter version by leaving the paws unstuffed and using only enough head filling to round the face. Keep all shaping rounds unchanged.
- Move the bunny slightly higher for more open blanket below it. Mark the new head center first, then move both ears and paws by the same distance.
Frequently asked questions
It is a flat granny square comfort blanket with a dimensional bunny head, two ears, and two paws sewn onto its upper central area. There is no separate rabbit body.
Two gray rounds create the broad, softly broken frame visible in the reference. The following ivory granny round and narrow sc edging leave a light margin outside it.
Block the square first, keep the head lightly stuffed, and spread the attachment over several solid clusters. Sew with the blanket resting flat and release any stitch that visibly narrows a nearby space.
No. Their double layer of ivory crochet provides structure, while the gray panels add a little firmness. Leaving them unstuffed lets them lie outward against the blanket.
Follow the yarn and stuffing care labels. Support the wet head when lifting the blanket, reshape the square and ears, and dry flat. Let the stuffed head dry completely before storing.
The finished Bunny Granny Square Comfort Blanket Crochet Pattern

