Daisy and Granny Square Grid Table Runner Crochet Pattern
Beginner Friendly
Perfect for those just starting their crochet journey, with clear instructions and simple techniques
Single-Day Project
A satisfying project you can complete in a single afternoon or evening.
Handmade Gift
A beautiful keepsake — free forever. Read online or print at home.
About This Daisy and Granny Square Grid Table Runner Crochet Pattern
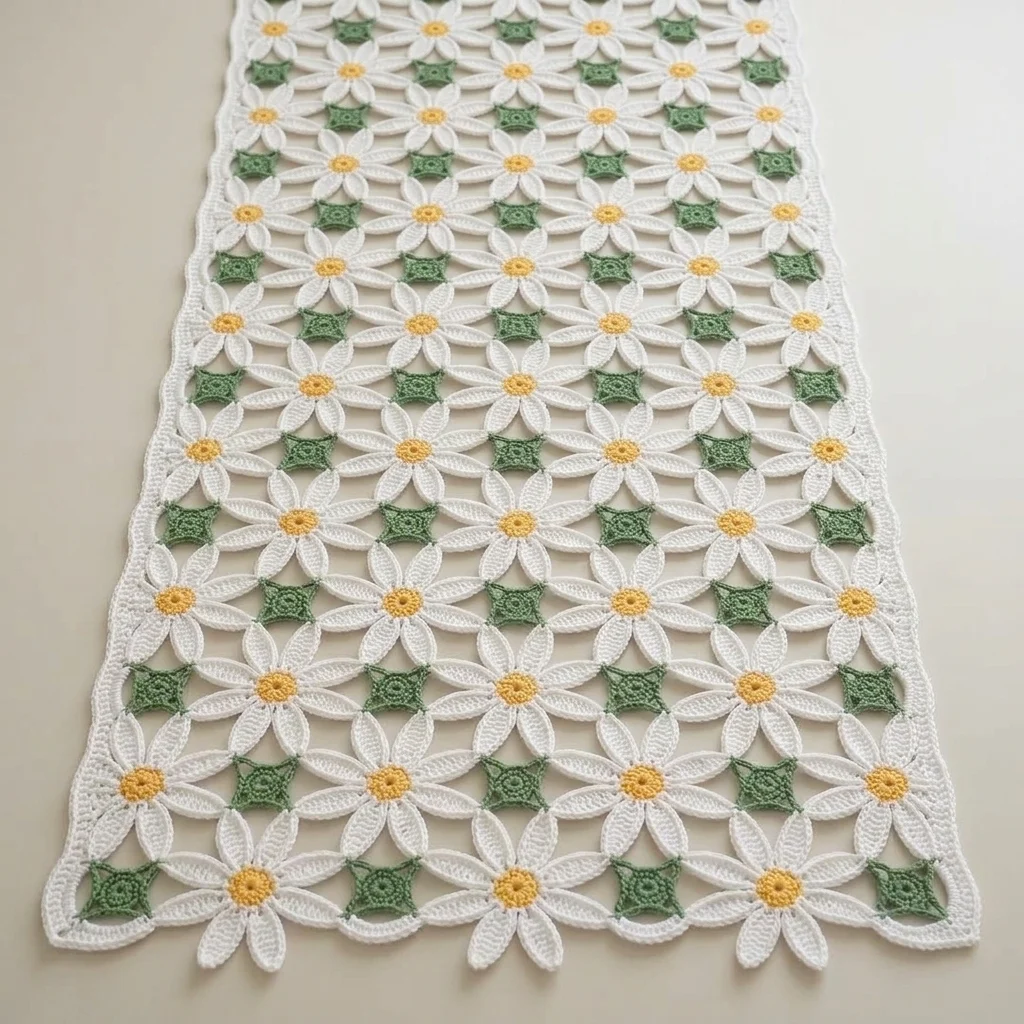
This crochet daisy table runner pattern joins two different motifs directly into one continuous grid: crisp white eight-petal daisies with sunny yellow centers, and small sage green granny squares that fill every gap between them. Worked as join-as-you-go rather than sewn together afterward, the whole piece builds up row by row into a soft-edged oval with no separate assembly step at the end.
What makes this design distinctive is the geometry of the layout itself: daisies sit at the intersections of an offset grid, each one surrounded by 4 neighboring daisies and 4 small squares, so the negative space between flowers is filled rather than left open. Joining everything as you go, rather than making a large pile of motifs to sew together later, is what makes this pattern genuinely advanced; you’re tracking join points on 2-3 sides of most motifs as you complete them. Expect to spend 18-22 hours total across roughly 30 daisies and 24 squares.
This is an advanced pattern, best suited to someone comfortable with join-as-you-go motif techniques and confident shaping an oval silhouette from a grid of joined pieces, rather than someone assembling motifs after the fact.
Materials
- DK weight cotton yarn, white ~150g, daisy petals
- DK weight yarn, yellow ~30g, daisy centers
- DK weight yarn, sage green ~60g, granny squares
- Crochet hook 3.5 mm (US E/4)
- Tapestry/yarn needle
- Steam iron and pressing cloth, or blocking mat and pins
- Sharp scissors
Abbreviations
chchainsl stslip stitchscsingle crochethdchalf double crochetdcdouble crochetMRmagic ringch-spchain spacest(s)stitch(es)reprepeatFOfasten offDaisy Motif (make approximately 30)
- With yellow, 8 sc in MR. Sl st to join, FO leaving a short tail. This is the flat center.
- With white, join in any st of the yellow center. Round 1 (petals): *ch 5, sl st in 2nd ch from hook, hdc in next 2 ch, dc in next ch, sl st in same base st; rep from * around all 8 sts to form 8 long pointed petals.
- FO leaving a long tail for joining. Repeat for approximately 30 daisies total, joining as you go per the assembly section below rather than making all 30 before starting to join.
Granny Square Motif (make approximately 24)
- With sage green, ch 4, sl st in first ch to form a ring. Round 1: ch 3 (counts as first dc), 2 dc in ring, ch 2, *3 dc in ring, ch 2; rep from * 2 more times (4 corner groups total). Sl st to join at top of ch-3.
- Round 2: sl st into next ch-2 corner sp, ch 3, (2 dc, ch 2, 3 dc) in same sp, *ch 1, (3 dc, ch 2, 3 dc) in next corner sp; rep from * around. Sl st to join.
- FO leaving a long tail for joining. Repeat for approximately 24 squares total, joining as you go rather than making all 24 upfront.
Join-As-You-Go Assembly, First Row
- Make the first daisy and set aside. Make a second daisy, and on its final petal round, join to the first daisy by working a sl st into the tip of one petal on the first daisy at the matching point where petals would touch, then continuing the second daisy’s petal round.
- Continue making daisies and joining each new one to the previous daisy in the row at one petal-tip point, until the first row has 4-5 daisies joined edge to edge in a straight line.
Join-As-You-Go Assembly, Square and Daisy Rows
- Begin the next row offset by half a motif width. Make a granny square, joining its Round 2 corners to the petal tips of two daisies above it in the previous row as you work that final round.
- Make a daisy, joining its petal round to the square just placed on one side and to the next daisy above it in the previous row on the other side, working both joins into the appropriate ch-sp or petal tip as you reach that point in the round.
- Continue alternating squares and daisies across this row, joining each new motif to its neighbors above and beside it as you complete its final round, until the row matches the width of the row above.
- Repeat this alternating square-and-daisy row structure, offsetting each row by half a motif as needed, until the grid measures approximately 60 cm long, tapering the daisy count at both the top and bottom rows to round the grid into an oval silhouette.
Finishing
Once the entire grid is joined, weave in every motif’s starting and ending tail individually on the wrong side, since join-as-you-go pieces leave more loose ends than a sewn-together layout. Steam-block the whole piece flat, pinning the outer daisy petals around the oval’s perimeter into an even, symmetrical edge. Let it dry completely flat before moving it to the table.
Tips for Success
- Join daisies and squares at the exact same point in each final round, either always at the corner ch-2 sp for squares or always at a specific petal tip for daisies, so the grid lines up consistently row after row.
- Work one full row at a time and check it lies flat before starting the next; join-as-you-go errors compound quickly if a whole row is slightly off.
- Keep tension on join slip stitches slightly looser than your normal stitches, since a tight join point can pucker and pull the surrounding motifs out of shape.
- Taper daisy count gradually at the top and bottom rows rather than cutting a row short abruptly, to keep the oval’s rounded ends smooth rather than stepped.
- Make one full daisy and one full square as trial pieces before committing to the assembly method, so the join-as-you-go technique feels familiar before you’re managing multiple join points per motif.
Common Mistakes to Avoid
- Joining motifs at inconsistent points from row to row causes visible misalignment across the grid. Fix: always join at the same designated point, petal tip for daisies, corner sp for squares, throughout the whole piece.
- Making all motifs before starting to join loses the benefit of join-as-you-go and requires much more sewing afterward. Fix: join each motif to its neighbors as you complete its final round.
- Tapering the oval’s rounded ends too abruptly leaves visible steps rather than a smooth curve. Fix: reduce the motif count by only 1 at a time per row near the top and bottom.
- Working join slip stitches too tightly puckers the surrounding grid. Fix: keep join points at a relaxed tension, similar to the rest of the motif.
- Skipping a trial daisy and square before starting the full grid often means discovering a sizing mismatch mid-project. Fix: always test both motifs together before committing to the full piece.
Ways to Customize This Pattern
- Swap the sage green squares for a different accent color to match a specific table setting.
- Reduce the grid to a smaller round or square shape for a matching set of coasters using the same two motifs.
- Use a pastel color instead of white for the daisy petals for a softer, less crisp look.
- Widen the oval by adding an extra column of motifs on each side for a broader table topper instead of a narrow runner.
- Skip the granny squares and join daisies directly to each other at multiple petal points for an all-daisy lace look.
Frequently asked questions
It’s a different kind of challenge rather than strictly harder. You avoid a separate sewing step at the end, but you do need to track multiple join points per motif while still working that motif’s final round, which takes some getting used to.
Roughly 30 daisies and 24 squares fill a grid of this size, but exact counts depend on your gauge and how many rows you work to reach your desired length. Build row by row and adjust the final row counts to finish the oval shape.
Yes. Skip the tapering rows at the top and bottom and keep every row the same daisy-and-square count for a straight rectangular grid instead of a rounded oval silhouette.
This usually means join points are pulling too tight in some spots and too loose in others. Recheck your join stitch tension for consistency across the whole grid, and block firmly to help even out any remaining minor waviness.
The finished Daisy and Granny Square Grid Table Runner Crochet Pattern

