Daisy Granny Square Bedspread Crochet Pattern
Beginner Friendly
Perfect for those just starting their crochet journey, with clear instructions and simple techniques
Single-Day Project
A satisfying project you can complete in a single afternoon or evening.
Handmade Gift
A beautiful keepsake — free forever. Read online or print at home.
About This Daisy Granny Square Bedspread Crochet Pattern
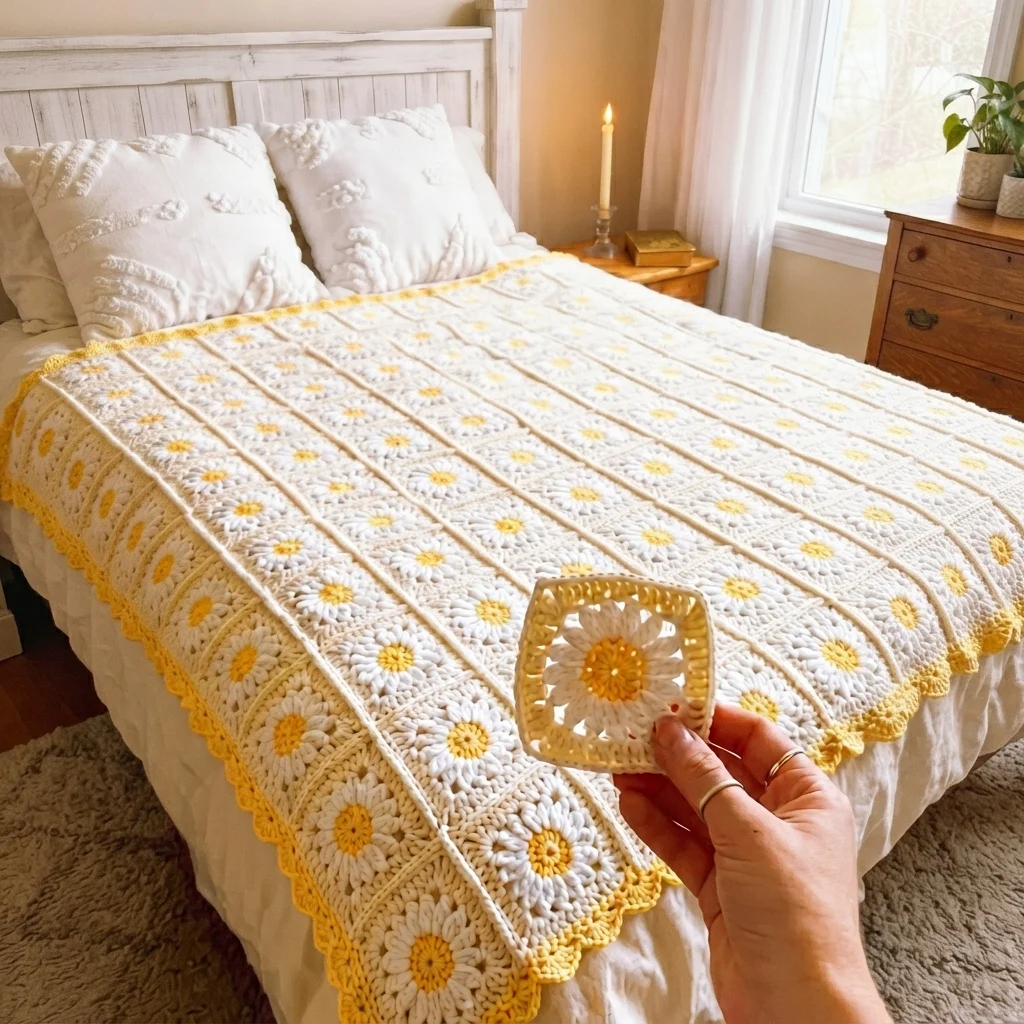
This crochet daisy granny square bedspread pattern joins a large grid of white daisy-petal squares with sunny yellow centers into a full coverlet, with distinct vertical white connecting columns running between each column of squares, and a cheerful yellow scalloped border framing the whole piece. The layout reads less like a typical flat granny grid and more like rows of daisies planted in neat garden columns, thanks to those raised connecting strips.
What makes this design distinctive is the vertical column structure: rather than joining squares directly edge to edge, a narrow strip of solid white stitches runs between each column, creating visual breathing room and a subtle textural ridge that breaks up what would otherwise be a dense, continuous grid. That column technique, worked consistently down the entire length of a bedspread-sized piece, is what elevates this beyond a standard granny square project. Expect to spend 45-55 hours total for the full bedspread.
This is an advanced pattern, best suited to someone comfortable maintaining a large grid of identical daisy squares plus a separate connecting-column technique between them, and confident with join-as-you-go assembly at full bedspread scale, rather than someone wanting a simple edge-to-edge granny square project.
Materials
- Worsted weight cotton yarn, white ~700g, petals and connecting columns
- Worsted weight yarn, cream ~400g, outer rounds
- Worsted weight yarn, golden yellow ~200g, centers and border
- Crochet hook 4.5 mm (US 7)
- Tapestry/yarn needle
- Steam iron and pressing cloth, or a large blocking mat and pins
- Sharp scissors
Abbreviations
chchainsl stslip stitchscsingle crochethdchalf double crochetdcdouble crochetMRmagic ringch-spchain spacest(s)stitch(es)reprepeatFOfasten offDaisy Granny Square (make approximately 180 for a full/queen bedspread)
- With golden yellow, 8 sc in MR, inc around (16 sts), sl st to join, FO leaving a short tail. This is the flat textured center.
- Round 2, with white: join in any st of the center. Round 1 (petals): *ch 2, dc 2 in next st, ch 2, sl st in same st; rep from * around all 16 sts. 16 daisy petals.
- Round 3, with cream: join behind the petals, working into the base sts between them. Ch 3, (2 dc, ch 2, 3 dc) in same base st, *ch 1, (3 dc, ch 2, 3 dc) in next base st; rep from * around, forming the first square corners around the daisy. Sl st to join, FO.
- Round 4, with cream: join at any corner ch-2 sp. Ch 3, (2 dc, ch 2, 3 dc) in same sp, *ch 1, 3 dc in next ch-1 sp, ch 1, (3 dc, ch 2, 3 dc) in next corner sp; rep from * around. Sl st to join, FO leaving a long tail for joining.
- Repeat this entire sequence to make approximately 180 squares total for the bedspread.
Vertical Connecting Column (worked between each column of squares)
- With white, work a narrow strip of solid dc, approximately 3-4 sts wide, matching the height of one square’s side, to form a short connecting column.
- FO leaving tails at both ends. Repeat to make enough column strips to run the full height of the bedspread between every pair of adjacent square columns.
Assembly, Daisy Columns and Connecting Strips
- Join squares into vertical columns first, stacking squares directly on top of each other within each column using a simple edge join at their corners and ch-1 sps.
- Once all columns are assembled (for example, 13 columns of 14 squares each for a queen-size coverlet, adjusting to your own mattress measurements), whipstitch a connecting column strip between each pair of adjacent square columns, joining the strip to both neighboring columns along its length.
- Continue until all square columns are joined together by connecting strips into one full-width panel.
Bedspread Border
- With golden yellow, join at any corner of the assembled bedspread. Round 1: sc evenly around the entire perimeter, working 3 sc at each of the 4 corners to keep them flat.
- Round 2 (scallop round): *sk 2 sts, 5 dc in next st, sk 2 sts, sl st in next st; rep from * evenly around all 4 sides, working extra repeats at each corner so scallops stay even in size.
- Join with sl st to first st and FO. Weave in all ends.
Finishing
Weave in every square’s and column’s starting and ending tail individually across the entire bedspread, since a project this size accumulates a very large number of loose ends. Steam-block the finished bedspread flat, pinning the yellow scalloped border open evenly on all 4 sides and checking that both the squares and the connecting columns lie flat with no puckering at their joins.
Tips for Success
- Keep every square’s round sequence identical across the whole bedspread; even small variations become very visible once dozens of squares sit side by side.
- Work all connecting column strips to exactly the same width and height, since any inconsistency there is immediately noticeable running vertically down the piece.
- Assemble full vertical columns of squares first, then join the columns together with connecting strips, rather than trying to build the grid row by row.
- Check that each connecting column lies flat and straight as you join it, correcting any twist before moving to the next one.
- Block the bedspread in sections on a large flat surface if you don’t have space to block the whole thing at once, working column by column.
Common Mistakes to Avoid
- Varying the daisy square’s color sequence or petal count between squares breaks the tile-like consistency this design depends on. Fix: keep a written reference of the exact round-by-round sequence and check it for every square.
- Making connecting columns different widths between different column pairs creates a visibly uneven grid. Fix: measure every column strip against the first one before attaching it.
- Joining squares within a column at inconsistent points causes individual columns to twist slightly. Fix: always join at the same designated corner and ch-sp points throughout.
- Underestimating how much yarn a project this size requires, especially the connecting columns. Fix: calculate total yardage from a few finished squares and a test column before buying all your yarn.
- Skipping intermediate flatness checks on a project this large means catching a drift only after many columns are joined. Fix: lay the growing bedspread flat and check it every few columns rather than only at the end.
Ways to Customize This Pattern
- Reduce the grid size for a throw blanket instead of a full bedspread.
- Swap the yellow daisy centers for a different color to shift the whole palette.
- Skip the connecting columns and join squares edge to edge for a simpler, more traditional granny square layout.
- Add a matching set of pillow shams using the same daisy square and column technique.
- Use a fabric backing on the full bedspread for added warmth and easier care.
Frequently asked questions
Block one square and one column strip first to get their exact finished measurements, then divide your desired bedspread width and length by those measurements to calculate your column count and square-per-column count, adding extra for overhang on the sides and foot of the bed.
Yes. Join squares edge to edge using the standard join-as-you-go method instead, for a more traditional flat granny square grid without the vertical ridge texture shown in the photo.
This usually means the column strip’s tension varied along its length, or it wasn’t joined evenly to both neighboring square columns. Work columns at a consistent tension throughout, and check that joins are spaced evenly along the entire strip.
Strongly recommended for the squares within each column. The connecting column strips are typically worked separately and then joined afterward, since they run a different direction than the square grid itself.
The finished Daisy Granny Square Bedspread Crochet Pattern

