Heirloom Daisy Lace Crochet Flower Curtain Pattern
Advanced
For experienced crocheters who enjoy complex shaping, fine detail, and ambitious construction
Weekend Project
A satisfying weekend make — start Friday, finish Sunday, enjoy forever.
Handmade Gift
A beautiful keepsake — free forever. Read online or print at home.
About This Heirloom Daisy Lace Crochet Flower Curtain Pattern
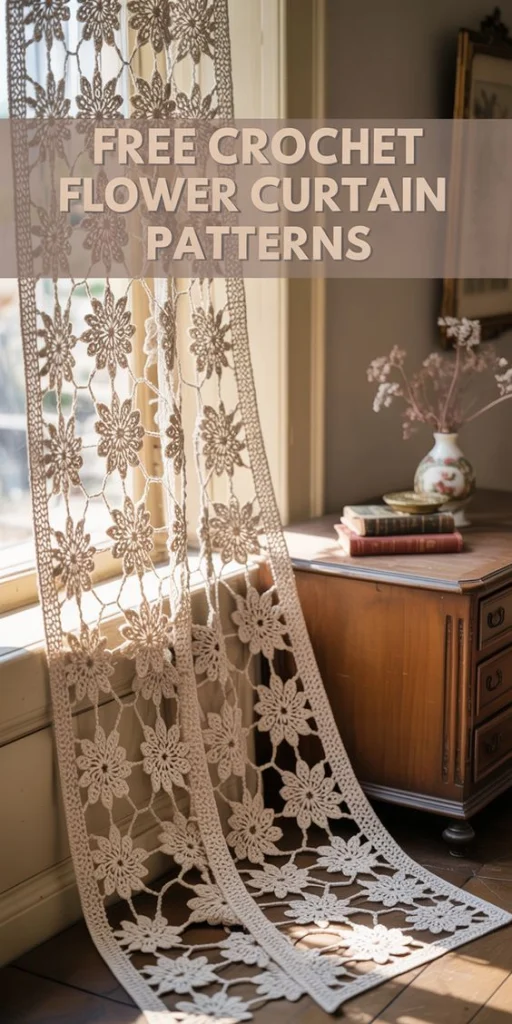
This crochet flower curtain pattern creates an ivory lace panel inspired by the long floral curtain in the reference photograph. Twelve-petal daisies sit inside an open chain lattice, with smaller junctions filling the spaces between flowers and a firm border framing the panel.
The construction combines separately worked flowers, measured chain bridges, four-arm lattice junctions and a rectangular frame. Allow approximately 45–65 hours for crocheting, joining and blocking. This advanced project suits crocheters who enjoy motif placement, precise finishing and adjusting lace to a measured blocking plan.
Materials
- Ivory mercerized cotton, fine / sport weight Approximately 1,800–2,200 m; buy the same dye lot throughout
- 2.5 mm crochet hook Adjust to obtain the blocked measurements
- Tapestry needle and small scissors For sewn joins and secure finishing
- Locking stitch markers Mark petal tips, corners and tab positions
- Blocking mats, rustproof pins and measuring tape A large gridded surface is especially useful
- Curtain rod Up to approximately 2.5 cm diameter for the specified tabs
Abbreviations
chchainsl stslip stitchscsingle crochethdchalf double crochetdcdouble crochetMRmagic ringst / stsstitch / stitchesUS terminology. Turning ch 1 never counts as a stitch. Join rounds with a sl st to the first sc unless directed otherwise. Joining slip stitches do not count.
Gauge, Size and Layout
- Blocked sc gauge: 20 sts and 24 rows = 10 × 10 cm. A relaxed chain strand should measure approximately 20 chains per 10 cm under light blocking tension.
- Each flower measures 10 cm across opposite tips. Arrange 40 flowers in 10 rows of 4, with centers 15 cm apart horizontally and vertically.
- The flower field measures 55 cm wide × 145 cm long: four 10 cm flowers plus three 5 cm gaps across, and ten 10 cm flowers plus nine 5 cm gaps down.
- Five frame rounds add approximately 2.1 cm on each side. The framed panel measures approximately 59 × 149 cm; folded tabs add approximately 5 cm above it.
- Make 40 flowers, 66 straight bridges, 27 four-arm junctions, one frame and six tabs. All pieces use the same ivory cotton. There is no stuffing or facial detailing.
Daisy Flowers — Make 40
- Round 1: Work 6 sc in MR. Close the ring and join. (6 sts)
- Round 2: Ch 1, work 2 sc in each st around; join. (12 sts)
- Round 3: Ch 1, work 2 sc in each st around; join. (24 sts)
- Round 4: Repeat the following 12 times: sl st in the next unused Round 3 st, ch 8, sc in the second ch from the hook, hdc in the next ch, dc in each of the next 3 ch, hdc in the next ch, sc in the final ch, sl st in the next unused Round 3 st. Each petal uses 2 center stitches and contains 7 return stitches. (12 petals; all 24 center stitches used)
- Fasten off. Weave the starting tail through the center twice to secure the ring. Block the petals flat without stretching the center into a hole.
- The petal tip is the outer turning point between the chain stem and its first return sc. Use this same point for every join. Orient one petal straight upward and number the petals clockwise from 0 through 11: petal 0 is at 12 o’clock, petal 3 at 3 o’clock, petal 6 at 6 o’clock and petal 9 at 9 o’clock.
Straight Chain Bridges — Make 66
- For each bridge, leave a 15 cm starting tail, ch 10 and fasten off with a 15 cm ending tail. Do not add a turning chain. (10 chains)
- Block each bridge to 5 cm between its two attachment points. The sewing tails are not included in this length.
- Use 30 bridges horizontally: in each of the 10 flower rows, connect petal 3 of each flower to petal 9 of its neighbor on the right. There are 3 bridges per row.
- Use 36 bridges vertically: in each of the 4 flower columns, connect petal 6 of each flower to petal 0 of the flower immediately below. There are 9 bridges per column.
- Sew each end through the petal-tip chain and adjacent sc with two small passes. Secure the tail along the underside of the petal. Keep the flowers pinned at their measured centers while joining.
Four-Arm Lattice Junctions — Make 27
- Center round: Work 4 sc in MR; join. Close the ring firmly. (4 sts)
- First arm: Ch 12 and fasten off, leaving a 15 cm sewing tail. (12 chains)
- Second arm: Join yarn with a sl st in the next center sc, ch 12 and fasten off with a sewing tail. (12 chains)
- Third arm: Join yarn in the next center sc, ch 12 and fasten off with a sewing tail. (12 chains)
- Fourth arm: Join yarn in the remaining center sc, ch 12 and fasten off with a sewing tail. Each junction now has 4 arms, one from each center stitch.
- Place one junction in the center of every four-flower opening: 3 openings across × 9 openings down = 27 junctions. Spread its arms toward the four surrounding flowers.
- Sew the upper-left arm to petal 4 of the upper-left flower; the upper-right arm to petal 8 of the upper-right flower; the lower-left arm to petal 2 of the lower-left flower; and the lower-right arm to petal 10 of the lower-right flower.
- Ease each arm into position with a slight curve. Its nominal chain length is 6 cm; it should fill the diagonal space without pulling a flower out of alignment. Keep all junction centers midway between the surrounding flower centers.
Rectangular Frame
- Foundation: Loosely ch 808 and join to the first chain without twisting. Divide the ring into this sequence with markers: 110 side chains, 2 corner chains, 290 side chains, 2 corner chains, 110 side chains, 2 corner chains, 290 side chains, 2 corner chains. The four sides contain 800 chains; the corners contain 8 chains.
- Round 1: Ch 1. Sc in each of the first 110 chains. Work (sc, ch 2, sc) around the following 2-chain corner segment, leaving those two foundation chains unworked individually. Repeat this method over the remaining sides of 290, 110 and 290 chains and their corner segments. Join. (808 sc and four ch-2 corner spaces)
- Round 2: Ch 1, sc in every sc around, working (sc, ch 2, sc) in each corner space; join. (816 sc and four ch-2 spaces)
- Round 3: Ch 1, sc in every sc around, working (sc, ch 2, sc) in each corner space; join. (824 sc and four ch-2 spaces)
- Round 4: Ch 1, sc in every sc around, working (sc, ch 2, sc) in each corner space; join. (832 sc and four ch-2 spaces)
- Round 5: Ch 1, sc in every sc around, working (sc, ch 2, sc) in each corner space; join. Fasten off. (840 sc and four ch-2 spaces)
- Count each straight side between corner spaces, including its end sc: Round 1 has short sides of 112 sc and long sides of 292 sc. These increase by 2 per side each round, reaching 120 sc and 300 sc respectively after Round 5.
- Block the inner foundation rectangle to 55 × 145 cm, keeping the corners square. The five rounds extend outward from this opening. Lay the flower field inside it with the top and bottom cardinal tips touching the short foundation edges and the outer side tips touching the long foundation edges.
- Using small overcast stitches, sew petal 0 of all 4 top flowers to the top inner edge, petal 6 of all 4 bottom flowers to the bottom inner edge, petal 9 of all 10 left flowers to the left inner edge, and petal 3 of all 10 right flowers to the right inner edge. This makes 28 attachment points; corner flowers each have two separate attachments.
Hanging Tabs — Make 6
- Foundation: Ch 9.
- Row 1: Sc in the second ch from the hook and in each remaining ch; turn. (8 sts)
- Rows 2–24: Ch 1, sc in each of the 8 sts; turn. (8 sts per row; 24 rows total)
- Fasten off with a 40 cm sewing tail. Block each tab to approximately 4 cm wide × 10 cm long.
- Number the 120 sc along the top outer frame edge from left to right, excluding the corner chain spaces. Position tabs over stitches 1–8, 23–30, 45–52, 69–76, 91–98 and 113–120.
- For each tab, sew its foundation end across the designated 8 frame stitches on the front. Fold the strip upward and back, then sew its final row across the same 8 stitches on the reverse. Keep the loop open. Reinforce both seams with a second pass.
Finishing
Check every bridge and junction before hiding the remaining tails. Weave each tail through several stitches on the underside, reverse direction, and trim only after the panel has been blocked and dried.
Soak the curtain according to the cotton label, press out water in a towel and pin the frame square. Set flower centers 15 cm apart, open the petals and ease the lattice into place. Let it dry completely before threading the rod through the six tabs. Hang the lower border clear of the floor to keep the lace clean and reduce strain on the joins.
Tips for Success
- Keep one blocked flower as your measuring sample. Compare every batch against it before joining.
- Mark petal 0 on every flower immediately after blocking. Consistent orientation makes the straight and diagonal attachments much easier to follow.
- Build the flower grid on a measured surface. Sewing loose motifs in your lap can shorten some bridges and distort the panel.
- Block the frame separately before attaching the flower field. Both pieces should meet naturally at the 55 × 145 cm inner boundary.
- Use a blunt needle and spread each join across the tip chain and adjacent sc, rather than pulling on one strand of cotton.
Common Mistakes to Avoid
- Using only one center stitch per petal produces too many petals. Each petal begins in one Round 3 stitch and ends in the next, giving exactly 12 petals.
- Working eight return stitches along a petal makes its base uneven. Skip the chain nearest the hook and work exactly seven return stitches.
- Pulling the diagonal arms taut tilts the daisies. Pin the centers first, then allow the junction arms a slight curve.
- Counting corner chains as sc changes the frame totals. Count sc separately from the four ch-2 spaces throughout.
- Sewing the tab sides closed prevents the rod from passing through. Attach only the two short ends, leaving the folded loop open.
Ways to Customize This Pattern
- Use warm ecru or natural flax-colored cotton for a deeper vintage shade while keeping the entire panel monochrome.
- Make two identical panels and hang them side by side for the paired, draped appearance in the reference photograph.
- For a wider rod, lengthen each tab by an even number of rows. Every additional 2 rows adds approximately 0.4 cm to its folded rise.
- For a shorter café curtain, use 6 flower rows: make 24 flowers, 38 straight bridges and 15 junctions. The inner field becomes 55 × 85 cm; use 170 chains for each long frame side instead of 290. The foundation then contains 568 chains, and frame Rounds 1–5 contain 568, 576, 584, 592 and 600 sc respectively.
Frequently asked questions
Measure after wet blocking, with opposite petals opened evenly. If it remains noticeably small, try a larger hook and remake the sample. Stretching a tight flower excessively can distort its center and put strain on the joins.
Yes, but the specified dimensions will change. Make a flower and bridge first, then calculate the field width as four flower diameters plus three bridge lengths, and its length as ten flower diameters plus nine bridge lengths. The frame must be redesigned to those measurements and the new stitch gauge.
The large spaces between the daisies let plenty of light through and provide limited privacy. Hang the panel in front of a separate plain sheer if you want more coverage while keeping the floral outline visible.
Remove it from the rod and follow the yarn label. For cotton that permits hand washing, support the whole wet panel, avoid wringing, and dry it flat to the original measurements. Hanging it while wet can lengthen the lattice and tabs.
The finished Heirloom Daisy Lace Crochet Flower Curtain Pattern

