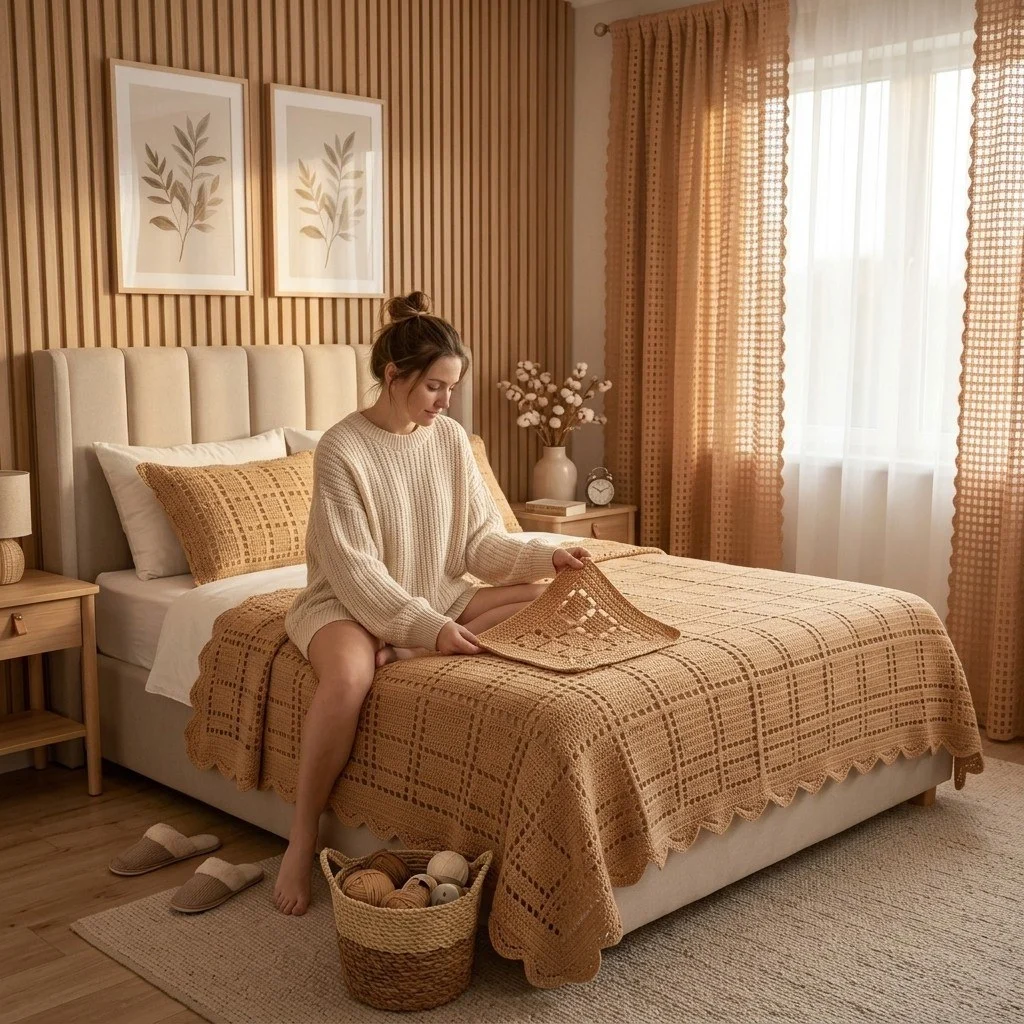
Honey Plaid Filet Crochet Bedspread
Advanced
For experienced crocheters who enjoy complex shaping, fine detail, and ambitious construction
Single-Day Project
A satisfying project you can complete in a single afternoon or evening.
Handmade Gift
A beautiful keepsake — free forever. Read online or print at home.
About This Honey Plaid Filet Crochet Bedspread
This crochet plaid bedspread pattern turns plain filet mesh into a woven-looking tartan grid, worked in one honey-coloured rectangle from the foundation chain to the scalloped picot edge. The plaid is not embroidered on afterwards and it is not colourwork — it is built from the squares themselves. Solid rows run across the fabric as horizontal bands, filled columns run up it as vertical bars, and where they cross you get the dense little knots that make the whole thing read as plaid from across the room.
It is an advanced project because of its scale and its bookkeeping rather than its stitches. You only need chain, double crochet and single crochet, but you have to hold an 11-square horizontal repeat and an 11-row vertical repeat in your head at the same time, for 89 squares and 89 rows, and a single miscounted square will shift a bar for the rest of the panel. Expect 35 to 45 hours spread over a few weeks. The finished cover measures about 150 x 180 cm after blocking, which fits a single bed generously or a double bed as a top throw.
This one suits a crocheter who likes long, rhythmic rows and wants a heirloom-scale piece to show for it. Cotton or a cotton blend is what gives the grid its crisp edges and the drape that lets the bedspread fall over the mattress instead of standing away from it. If you have made filet curtains or a filet tablecloth before, you already know the rhythm; if you have only made solid blankets, work the gauge swatch twice before you commit to the full chain.
Materials
- DK (light worsted) cotton or cotton-blend yarn in honey/caramel about 2,000 g / 4,600 m total
- 4 mm crochet hook or the size that gives you gauge
- Removable stitch markers at least 18
- Tapestry needle for weaving in ends
- Row counter or paper tally essential for the 11-row key
- Tape measure to check width every 10 rows
- Blocking mats and rustproof pins or a clean floor and towels
- Spray bottle of water for wet blocking
- Sharp scissors
Abbreviations
chchainsl stslip stitchscsingle crochetdcdouble crochetst / stsstitch / stitchessp / spsspace / spacesskskipreprepeatbegbeginningRSright sideFfilled square (2 dc)Oopen square (ch 1, dc)Gauge and Panel Plan
- Gauge: 11 squares = 17.5 cm wide and 11 rows = 21 cm tall, after blocking, using a 4 mm hook in DK cotton.
- One square = 2 stitch positions wide: either 2 dc (filled) or 1 dc + 1 ch-1 sp (open). Neighbouring squares share their dc posts.
- The panel is 89 squares wide and 89 rows tall: 8 full repeats of 11, plus 1 extra square and 1 extra row so the plaid ends with a bar on all four sides.
- 89 squares = 2 stitch positions each + 1 shared end post = 179 stitch positions per row. Every row, band or mesh, is 179 stitch positions wide.
- Panel before edging: about 142 x 170 cm. Border adds roughly 4 cm on each side, giving about 150 x 180 cm.
- Check the width of your work across row 10, row 30 and row 60. If it has narrowed by more than 2 cm, your band rows are tighter than your mesh rows; loosen the dc on band rows rather than changing hooks mid-panel.
How the Filet Squares Work
- Every row begins with ch 3, which counts as the first dc post of the row, and ends with dc worked into the top of the previous row’s beg ch-3.
- Open square (O) over an open square: ch 1, sk the ch-1 sp, dc in next dc.
- Open square (O) over a filled square: ch 1, sk 1 dc, dc in next dc.
- Filled square (F) over an open square: dc in the ch-1 sp, dc in next dc (2 dc).
- Filled square (F) over a filled square: dc in each of the next 2 dc.
- BAND ROW (solid): ch 3, sk first st, dc in each dc and 1 dc in each ch-1 sp across, ending dc in top of beg ch-3 — 179 dc, all 89 squares filled.
- MESH ROW (plaid bars): ch 3, then work squares across in this order: [F, O, F, O, O, O, F, F, O, O, O] eight times, then 1 F — 33 filled squares and 56 open squares, which is 123 dc and 56 ch-1 sps, 179 stitch positions in total.
- Vertical key, repeated every 11 rows: rows 1, 3, 7 and 8 of each block are BAND ROWS; rows 2, 4, 5, 6, 9, 10 and 11 are MESH ROWS. This mirrors the horizontal key exactly, so the plaid is square.
- Write the key on a slip of paper and tick each row as you finish it. The fabric alone will not remind you which block row you are on.
Foundation and Row 1
- Ch 181 loosely. If your chain is tight, use a hook one size larger for the chain only.
- Row 1 (RS, BAND ROW): dc in 4th ch from hook and in each ch across — 179 dc (the beg ch-3 counts as the first dc). This is 89 filled squares. Turn.
- Count the row before you go on. Lay the row flat and count in groups of ten; 179 dc is the number every single row of this panel must return to.
- Place a removable marker in the first dc and the last dc of row 1. These two markers stay in for the whole project and tell you where the bottom edge corners are when you reach the border.
Rows 2–11: The First Plaid Block
- Row 2 (MESH ROW): ch 3, work [F, O, F, O, O, O, F, F, O, O, O] eight times, then 1 F, ending dc in top of beg ch-3 — 33 filled, 56 open, 179 stitch positions. Turn.
- As you finish row 2, slip a removable marker into the top of the first dc of each filled bar group. These markers travel up the panel with you and are your insurance against a shifted bar.
- Row 3 (BAND ROW): ch 3, sk first st, dc in each dc and 1 dc in each ch-1 sp across, ending dc in top of beg ch-3 — 179 dc. Turn.
- Row 4 (MESH ROW): as row 2 — 33 filled, 56 open. Turn.
- Row 5 (MESH ROW): as row 2 — 33 filled, 56 open. Turn.
- Row 6 (MESH ROW): as row 2 — 33 filled, 56 open. Turn.
- Row 7 (BAND ROW): as row 3 — 179 dc. Turn.
- Row 8 (BAND ROW): as row 3 — 179 dc. Turn. Rows 7 and 8 together form the wide horizontal band.
- Row 9 (MESH ROW): as row 2 — 33 filled, 56 open. Turn.
- Row 10 (MESH ROW): as row 2 — 33 filled, 56 open. Turn.
- Row 11 (MESH ROW): as row 2 — 33 filled, 56 open. Turn. Block 1 is complete and measures about 21 cm tall.
Rows 12–88: Plaid Blocks 2–8
- Rows 12–22 (block 2): rep rows 1–11 exactly, remembering that row 12 is a BAND ROW worked over a mesh row — dc in each dc and 1 dc in each ch-1 sp, 179 dc.
- Rows 23–33 (block 3): rep rows 1–11.
- Rows 34–44 (block 4): rep rows 1–11.
- Rows 45–55 (block 5): rep rows 1–11. You are at the halfway point; measure the width here and compare it to row 10.
- Rows 56–66 (block 6): rep rows 1–11.
- Rows 67–77 (block 7): rep rows 1–11.
- Rows 78–88 (block 8): rep rows 1–11. The panel now measures about 168 cm tall unblocked.
- Join new balls at the end of a row, never mid-row: leave a 15 cm tail, start the new ball with the ch 3 of the next row, and knot nothing — weave both tails along the edge posts later.
Row 89: Top Band Row
- Row 89 (BAND ROW): ch 3, sk first st, dc in each dc and 1 dc in each ch-1 sp across, ending dc in top of beg ch-3 — 179 dc.
- Do not fasten off. Turn the work so the right side faces you and continue straight into the border round.
- Check that row 89 matches row 1: both are solid, both are 179 dc, and the plaid now reads the same from the top edge and the bottom edge.
Border Round 1
- Round 1 (RS): ch 1, 3 sc in the corner st at the end of row 89, then sc in each of the next 177 sts across the top edge, 3 sc in the last st (corner).
- Work down the first side edge: 2 sc around the post of the end stitch of each row, 89 rows — 178 sc. The two markers from row 1 show you where the bottom corners are.
- 3 sc in the corner st at the start of the foundation chain, then sc in each of the next 177 foundation chain stitches along the bottom edge, 3 sc in the last corner st.
- Work up the second side edge in the same way: 2 sc per row end, 89 rows — 178 sc. Sl st to the first sc to join.
- Count: 177 + 178 + 177 + 178 + (4 corners x 3 sc) = 726 sc. This total must be divisible by 6 for the edging to come out even, so recount before moving on; add or skip a single sc in the middle of a side edge if you are one or two out.
- Do not turn. The border is worked with the right side facing throughout.
Scalloped Picot Edging
- Round 2 (shells): ch 1, sl st in first sc, *sk 2 sc, 7 dc in next sc, sk 2 sc, sl st in next sc; rep from * around — 121 shells, each using 6 sc. Do not join with a ch; the final sl st falls in the last sc of round 1.
- Let the shells sit as they fall at the corners. Because 726 divides by 6 exactly, the repeat closes with no gap, and the corner fans simply sit slightly closer together.
- Round 3 (picots): sl st in each of the first 3 dc of the first shell, then in the 4th (centre) dc work: sl st, ch 3, sl st in 3rd ch from hook, sl st in the same dc. Sl st in each of the remaining 3 dc of the shell, sl st over the sl st between shells.
- Rep round 3 across every shell around the bedspread — 121 picots, one at the tip of each scallop.
- Sl st to the first sl st of the round, fasten off, leaving a 20 cm tail.
- Keep round 3 loose. Slip stitches worked tightly over a shell will cup the edge and make the scallops curl upward instead of lying flat.
Finishing
Weave every tail along the back of a solid band row for at least 8 cm, splitting the yarn ply with the needle as you go, then snip. Tails buried in the open mesh will show from the right side and will work loose with washing, so always run them through filled squares.
Blocking is what turns this from a wavy rectangle into a plaid. Soak the whole piece in cool water, press out the water between towels without wringing, then lay it out on a floor covered with dry towels or on joined blocking mats. Pin the four corners first, measure the diagonals and adjust until they match, then pin each side out to 150 cm and 180 cm, pinning into every single picot so the scallops stand out as points. Leave it until bone dry, which can take two days for cotton. When you unpin it, the vertical bars will line up with the horizontal bands and the open squares will be genuine squares rather than leaning rectangles.
Wash the finished bedspread on a cool gentle cycle in a mesh laundry bag and dry it flat. It will relax a little with each wash and can simply be smoothed and squared on the bed while damp.
Tips for Success
- Mark your bars. On the first mesh row, drop a removable marker into the first dc of each filled group and move it up every time you work a new mesh row. If a bar shifts, you will spot it within one row instead of ten.
- Keep the ch-1 spaces honest. A ch 1 that is pulled long reads as a ch 2 and widens the square; a very tight ch 1 pinches the mesh closed. Chain at the same tension you use for the dc, not tighter.
- Count in tens, not ones. Lay the row flat and count the dc posts in groups of ten along the top edge. Reaching 179 every row is faster to verify than tracking squares one by one.
- Stop at the end of a block, not mid-block. Putting the work down after row 11, 22, 33 and so on means you always pick up at a known point in the 11-row key.
- Work band rows with a relaxed hand. Solid dc rows naturally pull in more than mesh rows, and after 32 band rows that difference is visible as a waist in the middle of the bedspread.
Common Mistakes to Avoid
- Missing the last dc of the row. The final dc of every row goes into the top of the previous row’s beg ch-3, not into the dc beside it. Skip it and you lose one square per row and the side edge slants inward — fix it as soon as the count reads 177 instead of 179.
- Filling a square from the wrong side of the post. To fill a square over an open one, work dc in the ch-1 space and then dc in the next dc. Working both dc into the space leaves a loose post and an extra stitch.
- Losing track of the 11-row key. If you cannot tell whether you are on block row 9 or 10, count the mesh rows since the last pair of solid rows: one mesh row after a double band means you are on row 9.
- Over-tight edge posts in border round 1. Two sc into every row end sounds crowded, but one sc per row end will gather the sides and make the bedspread hourglass-shaped. Keep both sc and let the edge lie flat.
- Skipping blocking. Unblocked filet always looks crooked and the plaid will not read as plaid. The pattern relies on blocking to square the grid, not on tension alone.
Ways to Customize This Pattern
- Resize by whole repeats. Add or remove 11 squares in width and recalculate the chain as (squares x 2) + 3; add or remove 11 rows in height. For a single bed top throw, 67 squares by 78 rows works out to about 110 x 150 cm.
- Two-tone bands. Because band rows are complete rows, you can change colour cleanly at the row edge: work rows 1, 3, 7 and 8 of each block in a deeper caramel and the mesh rows in honey for a stronger plaid, carrying the unused yarn up the side edge.
- Widen the bars. Change the horizontal key to [F, F, O, F, O, O, F, F, F, O, O] and the vertical key to match (rows 1, 2, 4, 7, 8 and 9 as band rows) for a heavier, blanket-stitch look with less open mesh.
- Make a matching cushion front. Work 33 squares by 33 rows with the same keys, add border round 1 only, and seam it to a plain dc back over a 45 cm cushion pad.
- Change the weight. Worked in aran cotton with a 5 mm hook, the same 89 x 89 grid comes out around 180 x 215 cm and takes roughly a third less time, though it needs about 2,800 g of yarn.
Frequently asked questions
Always add or remove squares and rows in groups of 11, and keep the single extra square and extra row at the end so the piece starts and finishes with a bar. The foundation chain is always (number of squares x 2) + 3, so 78 squares needs ch 159 and 100 squares needs ch 203. Everything else in the pattern stays the same.
Yes. Split it into two panels, one 44 squares wide and one 45 squares wide, both 89 rows tall, then whipstitch them together through the outer dc posts before working the border. Put the seam between square 44 and square 45 so it falls where an open column meets a bar column — the bar hides the join. Expect the finished width to gain about 1 cm.
Roughly a quarter to a third. This layout is 63 per cent open squares on mesh rows, but 32 of the 89 rows are solid, so the average works out to about 2,000 g of DK cotton for the full 150 x 180 cm cover. Buy all of it in the same dye lot — a shade change partway up a plaid grid is very visible.
Much less than you would expect. The squares here are single-chain filet, so each hole is only about 8 mm across once blocked, which is too small for a toe and too tight for most rings. If you want it even more closed, go down to a 3.5 mm hook and accept a finished size closer to 135 x 160 cm.
Almost always row height rather than stitch count. If your dc is short, the 11 rows of a block come out shorter than the 11 squares are wide and the grid reads as rectangles. Measure a finished block: it should be about 17.5 cm wide and 21 cm tall before blocking, and square up to a true grid once pinned. If it is well off, work the dc with a taller yarn-over or block more aggressively lengthwise.
The finished Honey Plaid Filet Crochet Bedspread

