Joined Flower Grid Table Runner Crochet Pattern
Beginner Friendly
Perfect for those just starting their crochet journey, with clear instructions and simple techniques
Single-Day Project
A satisfying project you can complete in a single afternoon or evening.
Handmade Gift
A beautiful keepsake — free forever. Read online or print at home.
About This Joined Flower Grid Table Runner Crochet Pattern
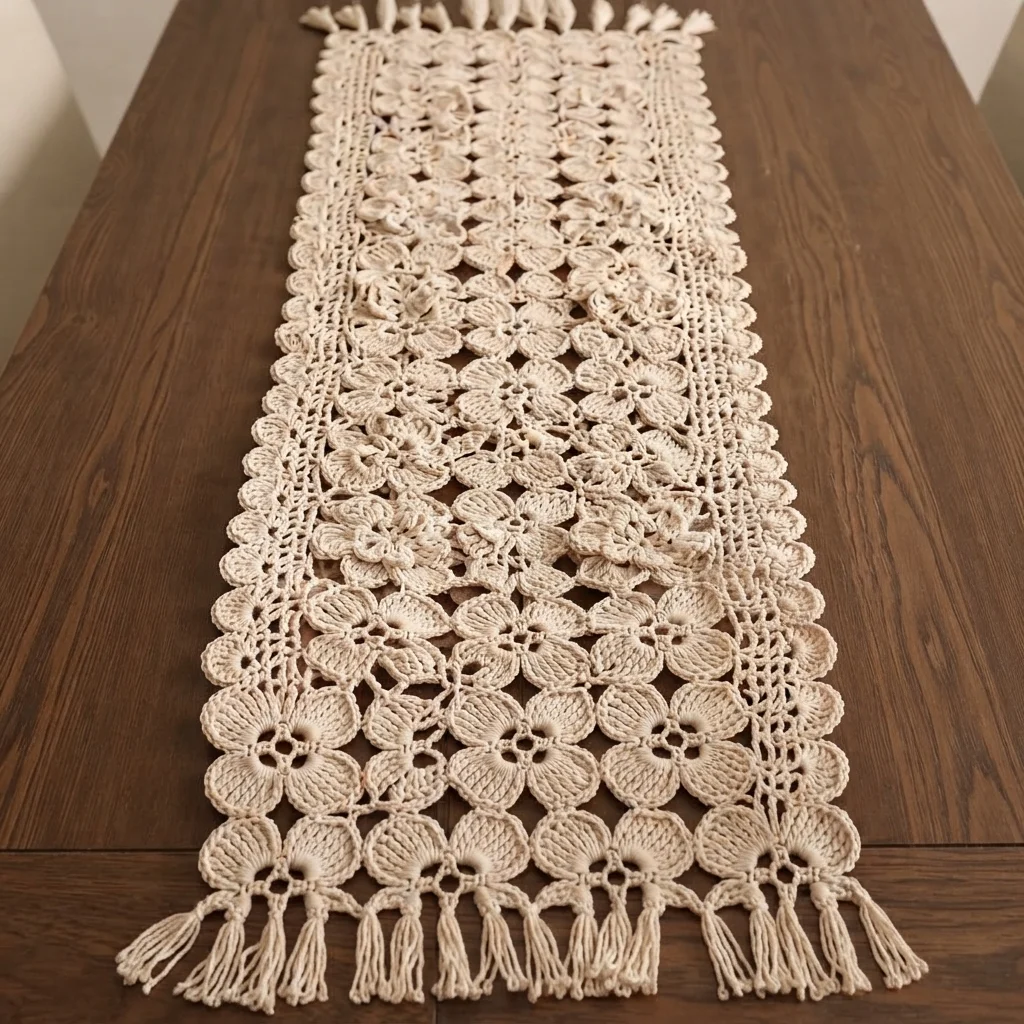
This crochet flower grid table runner pattern joins dozens of small, rounded flower motifs edge to edge into a 4-column grid running the full length of the piece, framed on both long sides by a narrow open lace border and finished at the top end with a full tassel fringe. Worked entirely in one cream cotton, the texture comes from the join-as-you-go flower grid itself rather than any color changes.
What makes this design distinctive is the sheer density of small motifs: each flower is only a few centimeters across, so covering a runner of this length means joining a large number of them directly into a continuous, gently domed textured field, more like a fabric than a scattered motif piece. The narrow lace side borders provide a clean, airy frame against the dense floral center, and the tassel fringe at one end adds a soft, finished detail without overwhelming the intricate grid. Expect to spend 26-30 hours total, the majority of it in joining the flower grid itself.
This is an advanced pattern, best suited to someone comfortable with join-as-you-go motif techniques over a large grid and confident maintaining consistent joins across dozens of small pieces, rather than someone wanting a quick or low-motif-count project.
Materials
- DK weight cotton yarn, cream ~350g, entire runner
- Crochet hook 3.25 mm (US D/3)
- Tapestry/yarn needle
- Steam iron and pressing cloth, or blocking mat and pins
- Piece of cardboard or a book for wrapping tassels
- Sharp scissors
Abbreviations
chchainsl stslip stitchscsingle crochethdchalf double crochetdcdouble crochetMRmagic ringch-spchain spacest(s)stitch(es)reprepeatFOfasten offFlower Motif (make approximately 80, joined as you go)
- Ch 4, sl st in first ch to form a ring. Round 1: ch 3 (counts as first dc), 11 dc into the ring. Sl st to join. (12 sts)
- Round 2 (petals): *ch 2, skip 1 st, sl st in next st; rep from * around to form 6 ch-2 loops.
- Round 3: in each ch-2 loop, work (sc, hdc, dc, hdc, sc) to form 6 small rounded petals. Sl st to join.
- On the final round, join each new flower to its already-placed neighbor(s) by working a sl st into the tip of one petal on the neighboring flower at the point where the two motifs touch, then continuing the current flower’s round. Most flowers join to 2-4 neighbors (left, right, above, and/or below).
- FO leaving a short tail. Continue making and joining flowers in this way, working row by row across the grid width and down the runner’s length.
Join-As-You-Go Grid Assembly
- Make the first flower and set aside as the top-left corner of the grid.
- Make a second flower, joining it to the first at one shared petal-tip point to begin the first row. Continue across to complete a row of 4 flowers.
- Begin the second row: make a flower and join it to the flower directly above it in Row 1, then continue across the row, joining each new flower to the one above and to its neighbor beside it as you complete its final round.
- Repeat this row-by-row join-as-you-go process, 4 flowers per row, until the grid measures approximately 115 cm long, checking every few rows that the grid lies flat and the columns stay straight.
Open Lace Side Borders (worked along each long edge of the finished grid)
- With cream, join at one corner of the flower grid. Row 1: work a row of ch-3 spaced dc along one entire long edge of the grid, attaching into the outer petal tips of the edge flowers, to form an open filet-style trim.
- Row 2: work a second row of the same open lace pattern just outside Row 1, offsetting slightly to build a narrow, two-row lace border.
- Repeat both rows along the opposite long edge of the grid.
- FO after each border section, leaving tails for finishing.
Top and Bottom Edge Finishing
- At the bottom short end of the grid (opposite the fringe end), work a simple row of sc evenly across, incorporating the ends of both side lace borders, to close off that end neatly.
- At the top short end, work the same sc finishing row, then continue directly into the fringe.
Tassel Fringe (at the top end)
- Cut cream yarn into lengths of approximately 22 cm, 3 strands per fringe knot.
- Fold each group of 3 strands in half, and using a crochet hook, pull the folded loop through a stitch along the top edge, then pull the loose ends through the loop and tighten to form a knot.
- Space fringe knots evenly across the entire top edge, roughly every 1.5 cm, for a dense, full fringe line.
- Trim all fringe ends evenly once every knot is in place.
Finishing
Weave in every flower’s starting and ending tail individually on the wrong side, since a join-as-you-go grid of this size leaves a large number of loose ends. Steam-block the entire runner face-down on a towel, pinning the grid flat and pinning both lace side borders open so their ch-3 spaces sit even. Let it dry completely flat, then comb through the fringe lightly with your fingers and trim evenly for a clean finish.
Tips for Success
- Work a test grid of at least 9 flowers before starting the full runner, to confirm your join tension keeps the grid flat rather than cupping or rippling.
- Join each flower at the exact same petal-tip point relative to its neighbors every time, so the grid lines up consistently row after row.
- Check your grid lies flat every 3-4 rows during the main assembly; catching a ripple early is much easier than un-joining rows later.
- Keep join stitches at a relaxed tension similar to the rest of the motif; overly tight joins pucker the surrounding flowers.
- Work both lace side borders after the entire grid is complete and blocked, so the border attaches to a stable, flat edge.
Common Mistakes to Avoid
- Joining flowers at inconsistent points from row to row causes visible misalignment across the grid. Fix: always join at the same designated petal-tip point throughout the whole piece.
- Making all flowers before starting to join loses the benefit of join-as-you-go and requires much more sewing afterward. Fix: join each motif to its neighbors as you complete its final round.
- Working the two lace border rows at inconsistent tension makes them ripple instead of lying flat. Fix: keep tension even and consistent across both border rows.
- Skipping a test grid often means discovering a flatness problem only after dozens of flowers are already joined. Fix: always test with a small grid section first.
- Cutting fringe strands to inconsistent lengths gives a ragged fringe edge. Fix: use a fixed-width cardboard wrap to cut every strand the same length.
Ways to Customize This Pattern
- Reduce the grid to 3 columns and a shorter length for a matching placemat using the same flower motif.
- Work the flowers in a soft pastel instead of cream for a different color story.
- Skip the fringe and finish both short ends with the same sc border for a symmetrical, fringe-free version.
- Widen the grid to 5 or 6 columns for a broader table topper instead of a narrow runner.
- Alternate 2 flower colors throughout the grid in a checkerboard pattern for a bolder look.
Frequently asked questions
Roughly 80 flowers in a 4-column by 20-row grid covers a runner of this length, but exact counts depend on your individual flower gauge. Build the grid row by row and adjust the final row count to reach your desired length.
Join-as-you-go saves a significant amount of finishing time compared to sewing dozens of small motifs together afterward, which is why it’s recommended for a grid this large. Making flowers separately and sewing them is possible but considerably more time-consuming.
Yes. Finish the top edge the same way as the bottom, with a simple sc border, for a clean, fringe-free runner on both ends.
This usually means join points are pulling too tight in some spots and too loose in others. Recheck your join stitch tension for consistency across the whole grid, and block firmly to help even out any remaining minor waviness.
The finished Joined Flower Grid Table Runner Crochet Pattern

