Puff Daisy Amigurumi Pattern
Beginner Friendly
Perfect for those just starting their crochet journey, with clear instructions and simple techniques
Single-Day Project
A satisfying project you can complete in a single afternoon or evening.
Handmade Gift
A beautiful keepsake — free forever. Read online or print at home.
About This Puff Daisy Amigurumi Pattern
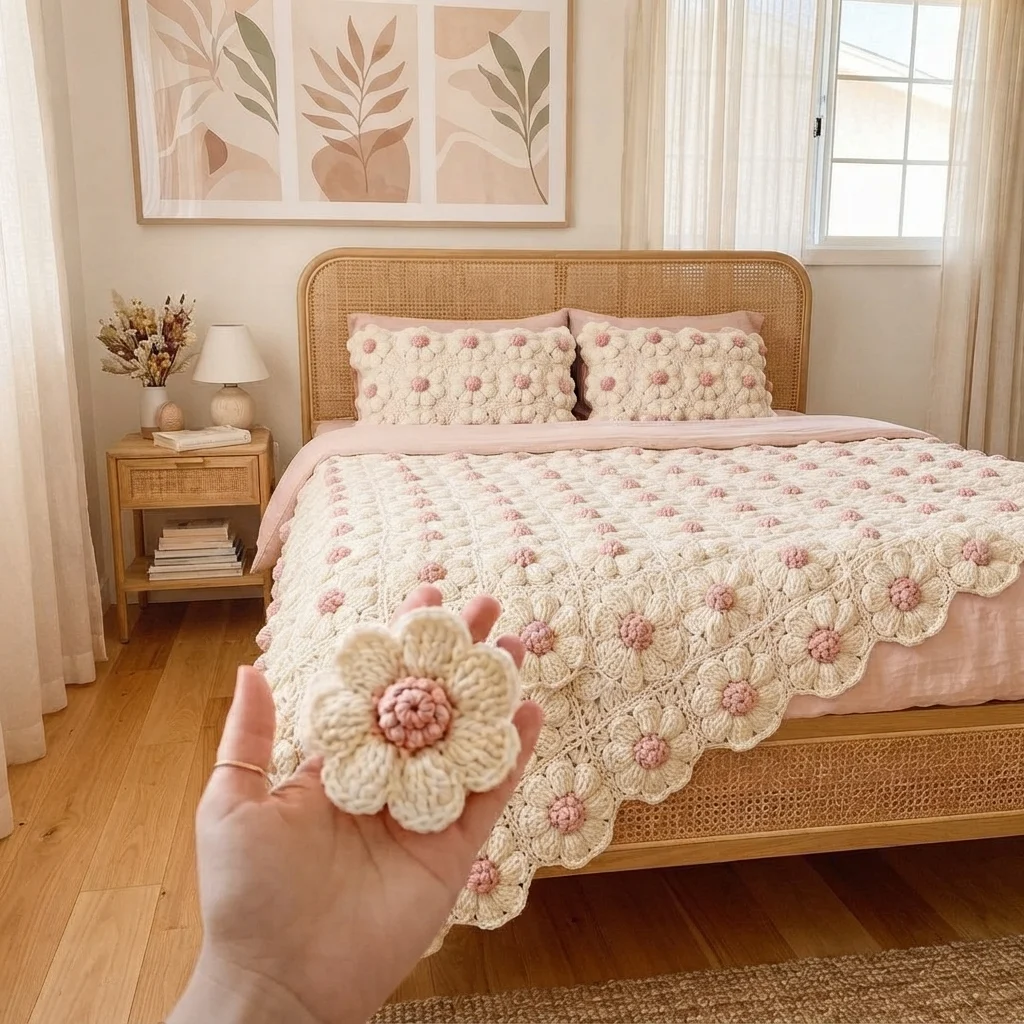
This puff daisy amigurumi pattern turns a flat flower motif into a soft, stuffed daisy you can hold in your palm. Eight plump cream petals ring a blush pink center, the same look as the puffy flowers you see on cozy blankets and textured pillows, but worked as a three-dimensional piece.
The design is built from ten separate pieces: a flat base disc, eight individually stuffed petals, and a round center ball. Each petal is sewn on by hand, then pinched with a small crease stitch so it holds the rounded daisy shape. The center is stuffed and given an embroidered dimple, which keeps the flower from looking flat.
Plan on three to four hours, mostly for the petals and assembly. It suits crocheters who are comfortable working in the round with a magic ring, stuffing small pieces evenly, and sewing parts together neatly. Make one as a brooch or bag charm, or make a dozen and sew them onto a pillow cover.
Materials
- Worsted weight cotton yarn, cream about 60 m / 65 yd
- Worsted weight cotton yarn, blush pink about 10 m / 11 yd
- 3.5 mm crochet hook a small hook keeps the stuffing from showing
- Polyester fiberfill a small handful
- Yarn needle
- Stitch marker
- Scissors
- Optional: pin-back or small hair clip for wearing it
Abbreviations
MRmagic ringscsingle crochetinc2 sc in the same stitchdecsingle crochet 2 together (invisible decrease)st(s)stitch(es)RroundFOfasten offPetals (make 8, cream)
- R1: 6 sc in MR (6 sts)
- R2: inc in each st around (12 sts)
- R3: (sc, inc) x 6 (18 sts)
- R4-R6: sc in each st around (18 sts, 3 rounds)
- R7: (sc, dec) x 6 (12 sts)
- Stuff lightly. You want a plump but squashable petal, not a hard ball.
- R8: dec x 6 (6 sts)
- FO, leaving a 15 cm tail. Thread the tail through the front loops of the remaining 6 sts, pull tight, and weave in the end.
- Pinch each petal flat, with the closed end facing the center of the flower, and press it between your fingers so it forms a plump oval.
Base Disc (cream)
- R1: 6 sc in MR (6 sts)
- R2: inc in each st around (12 sts)
- R3: (sc, inc) x 6 (18 sts)
- R4: (2 sc, inc) x 6 (24 sts)
- R5: (3 sc, inc) x 6 (30 sts)
- R6: (4 sc, inc) x 6 (36 sts)
- R7: sc in each st around (36 sts)
- FO, leaving a 30 cm tail for sewing. Lay the disc flat; it should be about 5.5 cm across.
Center Ball (blush pink)
- R1: 6 sc in MR (6 sts)
- R2: inc in each st around (12 sts)
- R3: (sc, inc) x 6 (18 sts)
- R4-R5: sc in each st around (18 sts, 2 rounds)
- R6: (sc, dec) x 6 (12 sts)
- Stuff firmly. The center should be denser than the petals.
- R7: dec x 6 (6 sts)
- FO, leaving a 30 cm tail. Close the hole as you did for the petals, but keep the tail to sew the center onto the base.
Finishing
Lay the base disc flat with the right side up. Divide the 36 edge stitches into eight groups by alternating 5 stitches and 4 stitches (5, 4, 5, 4, 5, 4, 5, 4). Place a pin at each group so you have eight evenly spaced points around the edge. Sew the closed end of each petal to the disc at one of these points, so that the petals sit slightly over the rim and overlap their neighbors by about a quarter of their width. Sew through the petal and the disc at least three times so the petals stay upright.
Next, pinch the middle of each petal and make one small crease stitch with cream yarn from the tip down toward the center. This gives the petal its folded, puffy look. Position the pink center ball in the middle of the disc, where the petals’ closed ends meet, and sew it down all the way around. Finally, use pink yarn to make a small stitch through the middle of the ball and pull it slightly to form a dimple, then weave in all ends. If you want a brooch, sew a pin-back to the base disc.
Tips for Success
- Use a hook one size smaller than the yarn label suggests. Tight stitches keep the fiberfill from peeking through, especially in cream.
- Stuff each petal with the same amount of fiberfill. Pull off a small piece, roll it between your fingers, and use the same-sized piece every time.
- Pin all eight petals in place before you sew a single one. Check the spacing from above, then adjust.
- Use cotton yarn if you can. It gives crisp stitch definition, which matches the clean look of the original flower.
Common Mistakes to Avoid
- Overstuffing the petals. They become round balls instead of soft petals. Remove some stuffing and flatten them before sewing.
- Sewing petals at uneven spacing. Count your edge stitches and pin first, using the 5-4 pattern above.
- Leaving a hole at the tip of the petal or the center ball. Weave the tail through the front loops twice before pulling it closed.
- Using a center ball that is smaller than the petals’ inner gap. If you can see the base disc between the petals, make the center with one extra even round (R4-R6 instead of R4-R5).
Ways to Customize This Pattern
- Make the center in butter yellow for a classic daisy, or in a deeper dusty rose for more contrast.
- Use bulky yarn and a 5 mm hook for a larger daisy that works as a pillow or a floor cushion.
- Make ten petals by adding two more petals and spacing them around the disc (adjust your edge groups to suit).
- Sew several daisies onto a plain cushion cover in rows, with the centers lined up, for a pillow like the one in the photo.
- Add a green leaf shape behind the base disc and turn the finished daisy into a bag charm or keychain.
Frequently asked questions
Worsted weight cotton gives the cleanest result, because it holds its shape and shows each stitch. Cotton blends and acrylic also work, though acrylic petals can look slightly softer and less defined.
About 10 cm across and 4 cm deep with worsted yarn and a 3.5 mm hook. Changing yarn weight or hook size will change this directly.
You can, but this is a stuffed, three-dimensional design, so it works best on pillows, wall hangings, and decor. For a blanket, you would want a flat version of the daisy without stuffing, which is a different pattern.
Usually the stuffing is uneven. Weigh out the same amount of fiberfill for each petal and flatten each one before sewing.
The finished Puff Daisy Amigurumi Pattern

