Rainbow Butterfly Amigurumi Pattern
Advanced
For experienced crocheters who enjoy complex shaping, fine detail, and ambitious construction
Single-Day Project
A satisfying project you can complete in a single afternoon or evening.
Handmade Gift
A beautiful keepsake — free forever. Read online or print at home.
About This Rainbow Butterfly Amigurumi Pattern
This rainbow butterfly amigurumi pattern turns the classic flat butterfly motif into a soft, dimensional toy with a stuffed body, a little face and four separate scalloped wings. Each wing is worked in joined rounds with a colour change on every single round, so you get that stacked rainbow look — lime green at the centre, then turquoise, yellow, orange and hot pink, finished with a purple shell edging that gives the wings their fluttery, lacy outline. The body is a two-tone tube in deep pink and yellow, firmly stuffed, with a small head joined on top and two knobbed antennae.
It takes most crocheters five to seven hours spread over an evening or two. The rounds themselves are short and the shaping is straightforward, but there is real finishing work here: six colour joins per upper wing, four separately made wing spots to sew on, French knots along the scallops, and a wing placement that has to be pinned and checked before you stitch it down. That is what makes it an advanced make rather than a quick one — the stitches are easy, the assembly is where the skill lives.
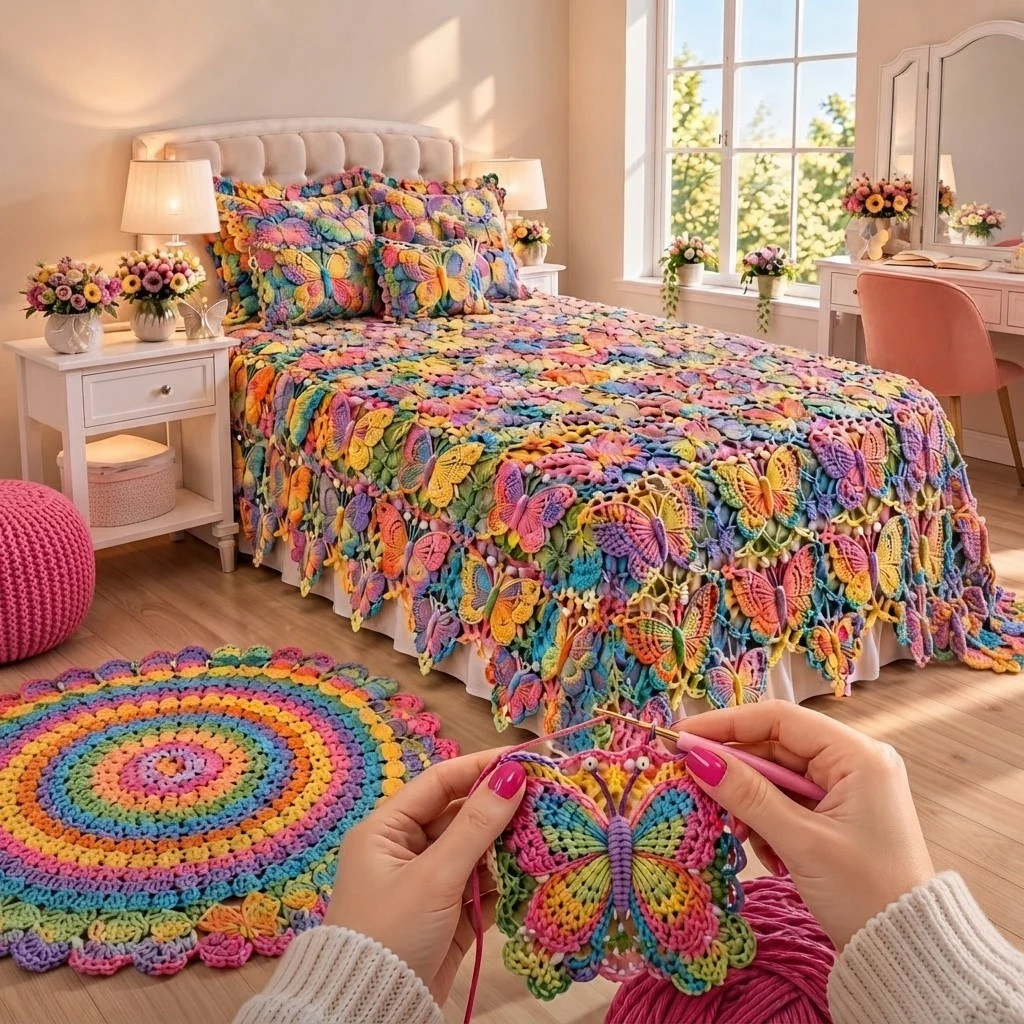
It suits anyone who already works confidently in the round, is comfortable carrying or cutting yarn at colour changes, and does not mind weaving in a lot of ends. The finished butterfly measures about 22 cm across the wings and sits nicely on a shelf, hangs from a loop of yarn above a cot, or gets handed to a child who will immediately try to make it fly. Make a whole flock in different colour orders and they look like the bedspread in the photo.
Materials
- DK yarn in lime green small amount, wing centres
- DK yarn in turquoise small amount
- DK yarn in bright yellow about 20 g, wings and thorax
- DK yarn in orange small amount
- DK yarn in hot pink about 25 g, wings, body and head
- DK yarn in purple about 15 g, edging and antennae
- DK yarn in cream small amount, wing spots
- 3.0 mm crochet hook tighter than the ball band suggests
- Black safety eyes, 6 mm 1 pair
- Polyester fiberfill about 30 g
- Black embroidery floss for the smile
- Cream embroidery floss or yarn for the French knots
- Yarn needle, stitch marker, rust-proof pins
Abbreviations
MRmagic ringchchainst(s)stitch(es)scsingle crochetdcdouble crochetsl stslip stitchinc2 sc in the same stitchdecinvisible decrease over 2 stsrndroundreprepeatFOfasten off( ) x6work the bracket 6 timesHead
- With hot pink, 6 sc in MR. (6)
- Rnd 2: inc x6. (12)
- Rnd 3: (sc in next st, inc) x6. (18)
- Rnd 4: sc in each st around. (18)
- Rnd 5: sc in each st around. (18)
- Rnd 6: sc in each st around. (18)
- Insert the 6 mm safety eyes between rnds 4 and 5, leaving 5 sts between them. Secure the washers before going further.
- Rnd 7: (sc in next st, dec) x6. (12)
- Stuff the head firmly, keeping the eye area smooth and rounded.
- Rnd 8: dec x6. (6)
- FO leaving a 30 cm tail. Run the tail through the front loops of the last 6 sts and pull closed. Do not weave in — this tail sews the head to the body.
Body
- With hot pink, 6 sc in MR. (6)
- Rnd 2: inc x6. (12)
- Rnd 3: (sc in next st, inc) x6. (18)
- Rnd 4: sc in each st around. (18)
- Rnd 5: sc in each st around. (18)
- Rnd 6: sc in each st around. (18)
- Rnd 7: sc in each st around. (18) — this is the abdomen, the fat lower end of the butterfly.
- Rnd 8: (sc in next st, dec) x6. (12)
- Begin stuffing the abdomen firmly now, while the opening is still wide.
- Rnd 9: change to yellow in the last pull-through of the previous stitch, then sc in each st around. (12)
- Rnd 10: (sc in next st, inc) x6. (18)
- Rnd 11: sc in each st around. (18)
- Rnd 12: sc in each st around. (18)
- Rnd 13: sc in each st around. (18) — this yellow section is the thorax, where the wings attach.
- Rnd 14: (sc in next st, dec) x6. (12)
- Finish stuffing firmly. The body should hold its shape when squeezed sideways.
- Rnd 15: dec x6. (6)
- FO, close the opening with the tail and weave the end down into the body.
Upper Wings (make 2)
- With lime green, ch 11.
- Rnd 1: 2 sc in the 2nd ch from hook, sc in next 8 ch, 4 sc in the last ch; working along the free loops of the opposite side of the chain, sc in next 8 ch, 2 sc in the same ch where you began. Join with sl st to the first sc. (24)
- Rnd 2: change to turquoise, ch 1. Inc x2, sc in next 8, inc x4, sc in next 8, inc x2. Join. (32)
- Rnd 3: change to yellow, ch 1. (sc in next 3 sts, inc) x8. Join. (40)
- Rnd 4: change to orange, ch 1. (sc in next 4 sts, inc) x8. Join. (48)
- Rnd 5: change to hot pink, ch 1. Sc in each st around. Join. (48)
- Rnd 6 (scallop edging): change to purple, ch 1. *Sl st in next st, skip next st, 5 dc in next st*; rep from * 15 more times — 16 shells worked over all 48 sts. Join with sl st to the first sl st.
- FO leaving a 40 cm tail on one wing and a 40 cm tail on the other. Weave in all the colour-change ends on what will be the back of the wing.
- Block each upper wing flat with pins and a light steam or spritz of water. The shells should lie open like petals, not curl under.
Lower Wings (make 2)
- With lime green, ch 8.
- Rnd 1: 2 sc in the 2nd ch from hook, sc in next 5 ch, 4 sc in the last ch; working along the free loops of the opposite side of the chain, sc in next 5 ch, 2 sc in the same ch where you began. Join with sl st to the first sc. (18)
- Rnd 2: change to turquoise, ch 1. (sc in next 2 sts, inc) x6. Join. (24)
- Rnd 3: change to yellow, ch 1. (sc in next 3 sts, inc) x6. Join. (30)
- Rnd 4: change to hot pink, ch 1. Sc in each st around. Join. (30)
- Rnd 5 (scallop edging): change to purple, ch 1. *Sl st in next st, skip next st, 5 dc in next st*; rep from * 9 more times — 10 shells worked over all 30 sts. Join with sl st to the first sl st.
- FO leaving a 35 cm tail. Weave in the colour-change ends on the back, and block flat as for the upper wings.
Antennae (make 2)
- With purple, 6 sc in MR. (6)
- Rnd 2: (sc in next st, dec) x2. (4)
- Push a pea-sized pinch of fiberfill into the knob now — you will not be able to reach it later.
- Rnds 3-8: sc in each st around. (4) — six rounds of narrow tube; the piece will twist slightly, which is fine and looks natural.
- FO leaving a 20 cm tail. Do not stuff the tube; let it stay soft so the antenna curves.
Wing Spots (make 2 large, 2 small)
- Large spot (make 2): with cream, 6 sc in MR. (6)
- Rnd 2: inc x6. Join with sl st to the first st. (12)
- FO leaving a 20 cm tail and pull the magic ring tight.
- Small spot (make 2): with cream, 6 sc in MR, join with sl st to the first st. (6)
- FO leaving a 20 cm tail and pull the magic ring tight.
- Press all four spots flat under a damp cloth so they lie smooth against the wings.
Finishing
Start with the face. Sew the head to the top of the yellow thorax using the long tail, working a full circle of stitches all the way around the join so the head cannot tilt. With black floss, embroider a small curved smile about two rounds below the eyes, catching only the surface of the fabric, and run the ends out through the back of the head before trimming.
Now the wings. Lay the body face down. Pin both upper wings to the back of the yellow thorax first, angling them up and outwards at roughly 45 degrees, with the colour-change seam of each wing tucked in against the body. Pin the lower wings underneath, overlapping the upper wings by about 2 cm and angling them down and outwards. Stand the butterfly up and look at it from the front before you stitch anything — this is the one step that decides whether it reads as a butterfly or as a pile of circles. When you are happy, sew each wing to the body through the back loops only of the hot pink round, using its own long tail and small firm stitches along a 3 cm line of contact.
Sew a large cream spot near the outer edge of each upper wing and a small cream spot onto each lower wing. With cream floss, work a French knot at the base of every second purple shell all the way around the four wings — these are the little dots that give the piece its beaded look. Finally, sew the antennae to the top of the head about 4 sts apart, angling them outwards into a V, and curve them gently with your fingers. Weave in the last ends and give the whole butterfly a light steam, holding the iron above the fabric and never touching it.
Tips for Success
- Change colour in the last pull-through of the final stitch of the previous round, not at the start of the new one. On a six-colour wing that one habit is the difference between a crisp rainbow ring and a stepped, muddy edge.
- Work the wings a little tighter than the body. They are flat pieces with no stuffing behind them, so a loose gauge makes them floppy and the scallops droop.
- Cut the ends of each colour to about 10 cm and weave them in on the back of the wing as soon as that round is finished. Ten ends per upper wing is miserable to face all at once at the end.
- Stuff the body in two stages, at rnd 8 and again at rnd 14. If you wait until the end you cannot reach the abdomen through a 12-stitch opening and the lower half stays soft and saggy.
- Block the wings before you sew them on, not after. Once they are attached to a stuffed body you cannot pin them flat without distorting the thorax.
Common Mistakes to Avoid
- Working the wings in a spiral instead of joined rounds. The colour changes will spiral around the wing and the two wings will never match. If you have already done it, the fix is to make the second wing the same way so at least they are a matching pair.
- Losing a stitch at the oval ends in rnd 1. Count the 24 (upper) or 18 (lower) stitches before moving on. The 4 sc worked into the last chain and the 2 sc worked back into the starting chain are easy to miscount, and every later round is built on them.
- Skipping the wrong stitch in the shell edging. Each repeat eats exactly 3 stitches: sl st, skip, 5 dc. If you reach the join with 1 or 2 stitches left over, you dropped or added a stitch somewhere in the plain pink round — undo the edging and recount rather than fudging the last shell.
- Attaching the wings with a single anchor stitch. A one-point join lets the wings swivel and flop forward. Sew along a 3 cm line of contact on each wing so they hold their angle.
- Placing the safety eyes too high. On an 18-stitch head, eyes above rnd 4 make the butterfly look startled. Between rnds 4 and 5, 5 stitches apart, gives the soft expression in the photo.
Ways to Customize This Pattern
- Swap the rainbow order for a single-family gradient — four shades of turquoise from pale to deep, with a cream edging — for a calmer nursery version.
- Make the wings in a fine cotton with a 2.5 mm hook and a 3.5 mm hook for the body. The wings turn crisp and lacy against a softer body, closer to the openwork motifs on the bedspread.
- Leave the face off entirely: skip the safety eyes and the smile, work the head in yellow to match the thorax, and you have a decorative butterfly motif for a garland or a cushion front.
- Add a hanging loop by chaining 30 at the top of the head before fastening off the antennae, and hang a few butterflies at different heights over a cot or a window.
- Scale the whole thing up with worsted yarn and a 4.0 mm hook for a roughly 30 cm butterfly pillow — work two extra even rounds on the body at rnds 7 and 13 so the proportions stay right.
Frequently asked questions
No. All four wings are symmetrical ovals, so the same piece works on either side. What makes them left and right is which way you turn them when you pin: put the colour-change seam against the body on both sides and the woven-in ends face the back.
Usually the 5 dc shells are worked too tightly, or the plain pink round before them was worked too loosely so the edge has to absorb extra fabric. Try the edging round with a hook half a size larger, and block the wing with pins while it dries. If it still cups, add one more plain sc round in pink before the shells.
Only with changes. Replace the safety eyes with embroidered black yarn eyes, skip the cream French knots or stitch them down very firmly, and sew the wings on with doubled yarn along the full line of contact. The scalloped edges are long and loose by design, so for a baby I would also work the edging round with a tighter hook.
Very little of the accent shades — lime green and orange together use under 10 g, and turquoise about 8 g. Hot pink and yellow do the heavy lifting since they cover the body and the widest wing rounds. This is a genuinely good scrap project; one 50 g ball of each colour will make at least three butterflies.
Yes. Work a matching second layer for each wing through rnd 5, skipping the edging, and sl st the two layers together before adding the shells through both. The doubled fabric holds an angle well. A light spray starch on the blocked wings also helps without making them crunchy.
The finished Rainbow Butterfly Amigurumi Pattern

