Striped Bobble Stitch Throw Blanket Crochet Pattern
Beginner Friendly
Perfect for those just starting their crochet journey, with clear instructions and simple techniques
Single-Day Project
A satisfying project you can complete in a single afternoon or evening.
Handmade Gift
A beautiful keepsake — free forever. Read online or print at home.
About This Striped Bobble Stitch Throw Blanket Crochet Pattern
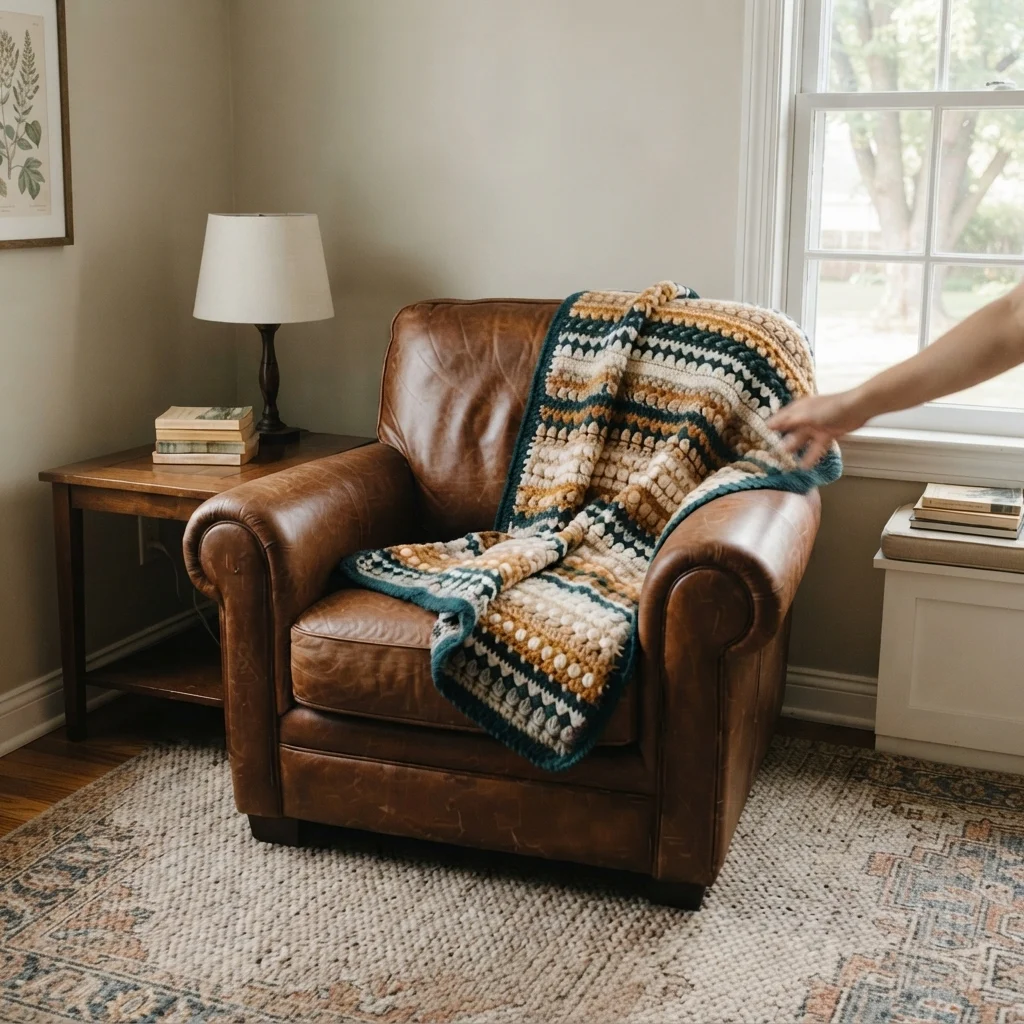
This crochet striped throw blanket pattern builds a long, richly textured panel entirely from stitch pattern and color changes, no applique or motifs involved. Bands of puffy bobble stitch in cream and mustard alternate with a diamond lattice intarsia stripe in teal, and solid garter-like rows in brown and cream fill the gaps between, all framed by a solid teal border and brown edge trim.
What makes this design distinctive is the sheer variety of texture packed into one repeating color sequence: unlike a simple striped blanket, every few rows switches not just color but stitch pattern, from dense bobbles to a diamond colorwork band to smooth solid rows, so the surface has real tactile variety from top to bottom. Managing that many stitch and color transitions consistently across a blanket-sized panel is what makes this a genuinely advanced project even without any separate motifs to assemble. Expect to spend 24-30 hours total, most of it in maintaining the bobble and diamond bands evenly across the full width.
This is an advanced pattern, best suited to someone comfortable combining bobble stitches, light intarsia colorwork, and solid rows within a single project and confident reading a repeating multi-section row chart, rather than someone wanting a single-stitch blanket.
Materials
- Worsted weight yarn, cream ~450g, bobble bands and solid rows
- Worsted weight yarn, mustard gold ~300g, bobble bands
- Worsted weight yarn, deep teal ~350g, diamond band and border
- Worsted weight yarn, brown ~250g, solid rows and edge trim
- Crochet hook 5 mm (US H/8)
- Bobbins or yarn butterflies, for the diamond colorwork band
- Tapestry/yarn needle
- Steam iron and pressing cloth, or a large blocking mat and pins
- Sharp scissors
Abbreviations
chchainsl stslip stitchscsingle crochethdchalf double crochetdcdouble crochetbobble5 dc worked in same st, yo and pull through all loops to closeMCmain color (varies by section, as noted)CCcontrast color (varies by section, as noted)st(s)stitch(es)reprepeatFOfasten offFoundation and Border Setup
- With teal, ch 101 (adjust to a multiple that suits your gauge for the desired width). Row 1: dc in 4th ch from hook and in each ch across. 99 sts.
- Rows 2-4: ch 3, turn, dc in each st across, working the solid teal border section.
- FO teal, join brown for a single trim row: ch 1, sc in each st across. FO brown.
Bobble Band (cream background, mustard bobbles)
- Row 1, cream: ch 1, turn, sc in each st across.
- Row 2, cream: ch 1, turn, sc 2, *bobble in next st (mustard, carried up from previous row or joined fresh), sc 3 in cream; rep from * across, ending sc 2.
- Row 3, cream: ch 1, turn, sc in each st across, plain.
- Row 4, cream: repeat Row 2’s bobble placement, offsetting the bobbles by 2 sts so they stagger rather than stack directly above the row below.
- Rep Rows 1-4 for 3 full repeats (12 rows total) to complete one bobble band section.
Diamond Intarsia Band (teal diamonds on cream background)
- Row 1, cream: ch 1, turn, sc in each st across, plain.
- Row 2: switch to intarsia, working small teal diamond points at regular intervals across the row: sc in cream up to each marked point, switch to a teal bobbin for 1 st, twist yarns, continue in cream.
- Row 3: increase each teal point by 1 st on each side, twisting bobbins at every color change, so each diamond begins to widen.
- Row 4: continue widening each diamond by 1 st per side.
- Row 5: work even at the diamond’s widest point.
- Rows 6-8: decrease each diamond by 1 st per side per row, tapering back down to a single point, then FO all teal bobbins and continue in plain cream.
Solid Brown and Cream Rows
- Rows 1-3, brown: ch 1, turn, sc in each st across.
- Rows 4-6, cream: ch 1, turn, sc in each st across.
- Rows 7-9, brown: repeat the brown section once more.
Main Panel Repeat
- Repeat the full sequence, Bobble Band, Diamond Intarsia Band, Solid Brown and Cream Rows, continuing down the length of the blanket until the panel measures approximately 160 cm long.
- End the sequence partway through a repeat if needed to reach your exact target length, finishing on a clean section boundary rather than mid-bobble-row.
Final Border
- With brown, work 1 trim row: ch 1, sc in each st across.
- With teal, work 3-4 rows of solid dc to mirror the starting border, ending with a final sc row for a clean edge.
- FO leaving a long tail.
Side Edging
- With teal, join evenly along one long side. Work 1 row of sc evenly down the entire side edge to neaten the row-end bumps from all the color and stitch changes.
- Repeat along the opposite long side. FO and weave in all ends.
Finishing
Weave in every yarn end from each section and every intarsia bobbin individually on the wrong side, since a blanket with this many stitch and color transitions accumulates a large number of ends. Steam-block the entire blanket flat on a large surface, pinning the edges straight and square, and gently pressing the bobble bands just enough to even their texture without flattening them completely. Let the whole piece dry completely before folding or using.
Tips for Success
- Swatch all 3 texture sections together before starting the full blanket, since gauge can shift noticeably between bobble rows, intarsia rows, and plain solid rows.
- Keep a written row tally or chart taped nearby; with this many stitch pattern changes, it’s easy to lose track of which row of which section you’re on.
- Twist intarsia bobbins at every single color change in the diamond band, even for single-stitch diamond points, to avoid holes.
- Work the side edging row after the entire panel is complete, not as you go, so you can neaten all the row-end transitions in one consistent pass.
- Press bobble bands gently during blocking rather than firmly, so the texture stays raised and tactile rather than flattening under heavy steam.
Common Mistakes to Avoid
- Losing track of which stitch section you’re working on causes bobble, diamond, and solid rows to blend together incorrectly. Fix: keep a visible row tally and check it before starting each new row.
- Skipping the bobbin twist at small diamond points leaves tiny holes throughout the colorwork band. Fix: twist yarns at every color change, regardless of how small the point is.
- Letting panel width drift between the 3 different stitch sections throws off the blanket’s edges. Fix: count total stitches across the row at the start of every new section to confirm width hasn’t changed.
- Pressing bobble bands too firmly during blocking flattens their texture. Fix: steam gently and let the bobbles keep their raised, puffy shape.
- Working the side edging before the panel is fully finished means redoing it if the panel length changes. Fix: wait until the entire panel and both borders are complete before adding side edging.
Ways to Customize This Pattern
- Shorten the panel length for a lap blanket instead of a full throw.
- Swap the teal, mustard, and brown palette for a different color story to match your own decor.
- Reduce to 2 texture sections, bobble band and solid rows only, skipping the diamond intarsia for a simpler, faster project.
- Widen the starting chain for a bed-sized blanket instead of a throw.
- Add a row of fringe along both short ends for a more finished, textile-like look.
Frequently asked questions
This depends on your gauge and target length; plan for roughly 4-6 full repeats of the Bobble Band, Diamond Band, and Solid Rows sequence to reach approximately 160 cm, adjusting based on your own row gauge.
Yes. Replace that section with an additional set of solid brown and cream rows, or a second bobble band in a different color combination, for a slightly simpler blanket using the same overall structure.
Bobble stitches naturally pull fabric in slightly more than plain sc or dc. If the difference is significant, work the sts on either side of each bobble a touch looser, or add 1-2 extra sts at the start of bobble sections to compensate.
The solid rows and bobble bands look similar from both sides, but the diamond intarsia band shows carried yarn floats on the back, so this blanket has a clear right side where the colorwork row is concerned.
The finished Striped Bobble Stitch Throw Blanket Crochet Pattern

