Three-Tone Textured Maple Leaf Table Runner Crochet Pattern
Beginner Friendly
Perfect for those just starting their crochet journey, with clear instructions and simple techniques
Single-Day Project
A satisfying project you can complete in a single afternoon or evening.
Handmade Gift
A beautiful keepsake — free forever. Read online or print at home.
About This Three-Tone Textured Maple Leaf Table Runner Crochet Pattern
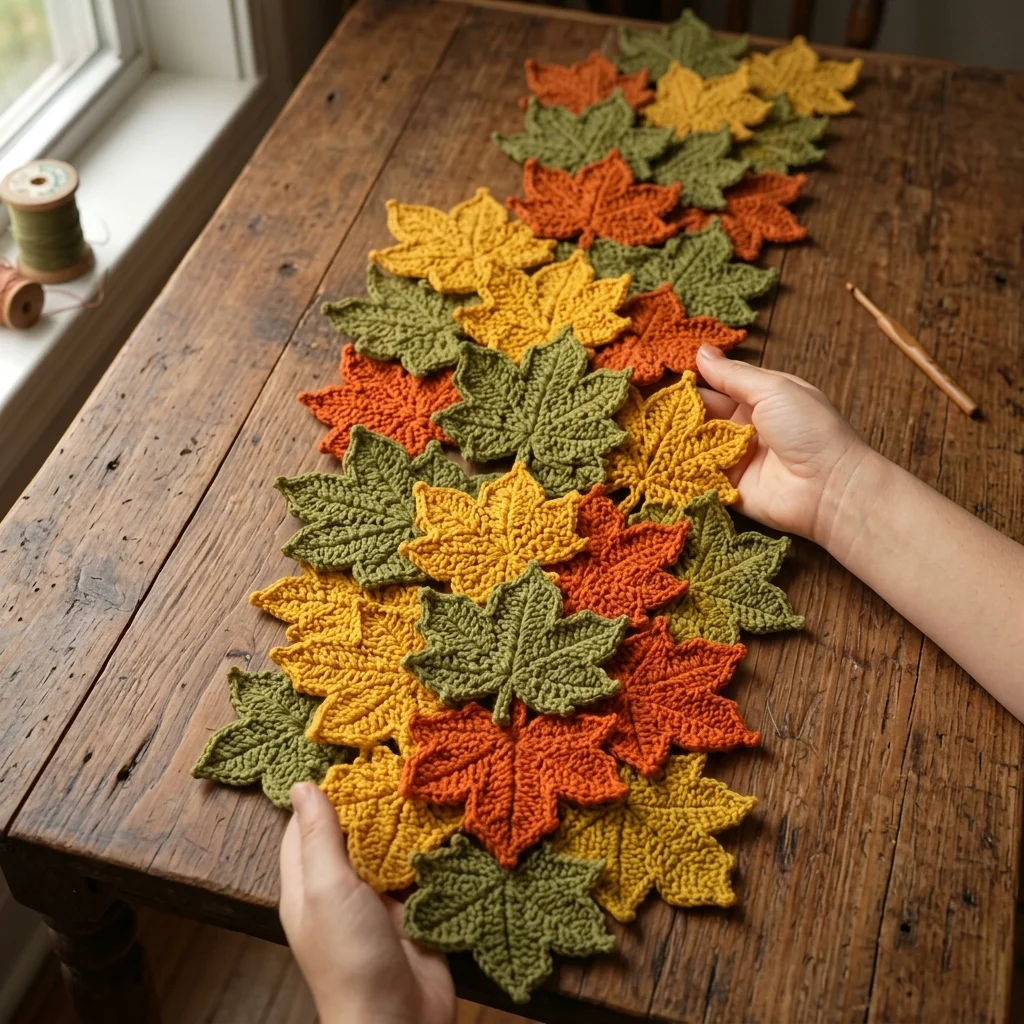
This crochet maple leaf table runner pattern joins more than 24 large maple leaves directly edge to edge in just three colors, olive green, mustard gold, and rust orange, so the pattern reads as bold and graphic rather than a soft blended gradient. Every leaf carries deep, raised front-post veining down each lobe, giving the whole surface real texture you can feel as well as see.
What makes this design distinctive is the ridged vein technique: instead of a light embroidered line, each lobe gets a genuine front-post double crochet column worked directly into the stitches below, so the veins stand up in visible relief against the flatter background of the leaf. Because leaves overlap directly with no connector chains or gaps, and because the palette stays limited to just three high-contrast colors, the finished piece reads as a dense, almost tile-like field rather than a scattered drift. Expect to spend 16-20 hours total, mostly in the leaves themselves since the ridging round adds real time per motif.
This is an advanced pattern, best suited to someone comfortable with front-post relief stitches and confident joining a large number of overlapping motifs without a backing, rather than someone wanting a light, quick leaf project.
Materials
- Worsted weight yarn, olive/moss green ~90g
- Worsted weight yarn, mustard gold ~90g
- Worsted weight yarn, rust orange ~70g
- Crochet hook 4.5 mm (US 7)
- Tapestry/yarn needle
- Steam iron and pressing cloth, or blocking mat and pins
- Sharp scissors
Abbreviations
chchainsl stslip stitchscsingle crochethdchalf double crochetdcdouble crochettrtreble/triple crochetFPdcfront post double crochetst(s)stitch(es)reprepeatFOfasten offTextured Maple Leaf Motif (make approximately 26: mix of olive, mustard, and rust)
- Ch 4, sl st in first ch to form a small foundation ring.
- Lobe 1, top center: ch 12. Starting in 2nd ch from hook: sl st, sc 2, hdc 2, dc 3, tr 2 (10 sts). Sl st into ring.
- Lobe 2, upper right: ch 9. Starting in 2nd ch from hook: sl st, sc 2, hdc 2, dc 2 (8 sts). Sl st into ring.
- Lobe 3, lower right: ch 6. Starting in 2nd ch from hook: sl st, sc 2, hdc 1 (4 sts). Sl st into ring.
- Lobe 4, lower left: repeat Lobe 3 exactly. Sl st into ring.
- Lobe 5, upper left: repeat Lobe 2 exactly. Sl st into ring.
- Sl st into base of Lobe 1 to close. Do not FO; continue to the ridging round.
- Ridging round: work back around the outer edge of all 5 lobes, working FPdc stitches down the center of each lobe from base to tip to raise a ropey vein line, sl st between veins to travel along each lobe’s edge.
- Sl st to close, FO leaving a 15-20 cm tail for joining. Repeat for approximately 26 leaves total.
Blocking Each Leaf
- Lightly steam or mist each finished leaf, right-side up, and pin it flat with all 5 lobes spread evenly, being careful not to flatten the raised FPdc veins.
- Let dry completely before joining. Repeat for all 26 leaves before you begin assembly.
Direct Edge Joining
- Lay out all 26 blocked leaves on a large flat surface, mixing olive, mustard, and rust throughout rather than grouping by color, so no large block of one color forms in any one area.
- Rotate leaves at varying angles, overlapping their lobe tips directly against neighboring leaves so there are no visible gaps or background showing through, and mix leaf orientation so some point up the runner and some point across it.
- Once you’re happy with the layout, join each pair of touching leaves with a few whipstitches directly where their lobes overlap, using a matching or neutral yarn tail and catching 2-3 stitches per contact point.
- Work outward from one end of the runner to the other, joining each new leaf to all of its already-placed neighbors before moving on.
Finishing
Turn the finished runner over and check for any leaf joined at only one point; a leaf attached at a single spot will flop or twist, so add a second join wherever needed. Weave in all remaining tails securely. Give the whole runner a final light steam from a slight distance rather than pressing directly, so the raised veining on every leaf stays intact rather than flattening under the iron.
Tips for Success
- Lay out the full three-color mix on the floor before joining a single stitch; with only three colors, it’s easy to accidentally cluster one shade if you don’t check the layout as a whole first.
- Work the FPdc ridging round at even tension across all 5 lobes on every leaf; inconsistent ridging is very noticeable once dozens of leaves sit side by side.
- Join each leaf at 2-3 points minimum, not just one, so the whole joined field holds flat without individual leaves flipping up.
- Rotate leaf orientation deliberately, some pointing lengthwise, some sideways, so the finished piece looks tumbled rather than combed into rows.
- Steam from a slight distance rather than pressing the iron directly onto leaves, to protect the raised vein texture you worked to build.
Common Mistakes to Avoid
- Grouping same-colored leaves together in sections instead of mixing them throughout breaks the bold, evenly distributed three-color look. Fix: distribute all three colors evenly across the whole runner as you lay leaves out.
- Skipping the FPdc ridging round or substituting a simple embroidered line loses the raised, tactile texture that defines this design. Fix: work genuine front-post stitches as instructed for real dimension.
- Leaving visible gaps between leaves where the table shows through breaks the dense, tiled effect. Fix: overlap lobe tips generously before joining.
- Pressing an iron directly onto the leaves during blocking flattens the ridged veins. Fix: steam from above without full contact pressure.
- Joining leaves in a strict end-to-end line instead of a scattered, overlapping cluster looks like a chain rather than a dense field. Fix: let leaves overlap in multiple directions, not just lengthwise.
Ways to Customize This Pattern
- Swap the three-color autumn palette for greens, blues, and creams for a different seasonal or year-round version.
- Reduce to 14-16 leaves for a shorter centerpiece mat instead of a full table runner.
- Skip the FPdc ridging round for a faster, flatter version of the same leaf shape if time is limited.
- Join leaves into a round cluster shape instead of an elongated strip for a wreath-style centerpiece.
- Use just two colors instead of three for an even bolder, more graphic look.
Frequently asked questions
Pin leaves to a foam blocking board or thick towel in your final layout before joining anything. This holds the arrangement still so you can join point by point without leaves shifting out of place.
Front-post stitches require reaching around the post of a stitch from the previous round rather than working into the top of a stitch, which is naturally slower than standard stitches. This is expected and is what creates the raised, ropey vein texture.
Yes. Add extra leaves at the midpoint of the layout, keeping the three-color mix balanced, rather than adding length only at one end.
This usually means the ridging round was skipped or worked as regular dc instead of true FPdc. Recheck that Round 2 of each leaf works around the post of the stitch below, not into its top, to create the raised vein.
The finished Three-Tone Textured Maple Leaf Table Runner Crochet Pattern

